 Coefficient Cycling RR Bars Review
This is a review of Coefficient Cycling RR Bars, including the trials and tribulations of running Di2 wires but focussing more on the clever ergonomic tweaks Coefficient made for multiple hand positions. The company suggests that in addition to modest aero gains from the bars themselves, there may also be improved cardiovascular performance aided by ergonomics.
TL;DR – These are really comfy, good-looking carbon drops with an aero top that are probably aerodynamically faster and lighter than my replaced bars. They are straightforward to fit on a regular stem and include an integrated Garmin/Wahoo mount but improved routing would have helped handle the trickier needs of 11-speed Di2 wiring.
BONUS: They facilitate a novel, built-in TT-like riding position that is UCI-legal.
My plan for 2023 was to get an aero road bike. Instead, I scaled back my ambitions quite significantly and added these cool aero drops to my Cervelo R5 (climbing bike).
More: Coefficient Cycling
⭐⭐⭐⭐⭐ My Fave bars. Best I've ever used.
Review Summary - Coefficient Cycling RR Bars
I like everything about these bars.
Looks. Comfort. Aeroness. Position. Compatibility.
OK they are a bit expensive and a faff to wire up but those are mere smallscale annoyances right at the start of your many thousand-mile journey with some great handlebars.
Pros
- Comfort
- Fits a large number of stems
- No need to change the stem length
- Di2-compatible holes and wiring runs
- Satellite/Sprint shifter compatibility
- Disk/Rim compatible cabling holes and runs
- Probably good aero both from flat design and tidier cable/wire runs
Cons
- Cost
- Tiny weight penalty
- Takes time to wire/cable up. Hydraulic brake and manual gear cables when used together will be trickier.
What’s Different About Coefficient Cycling Bars
Coefficient Bars are more than aero enough and more than light enough. What sets them apart is the carefully thought-through ergonomics including better support for a UCI-legal aero ride position.
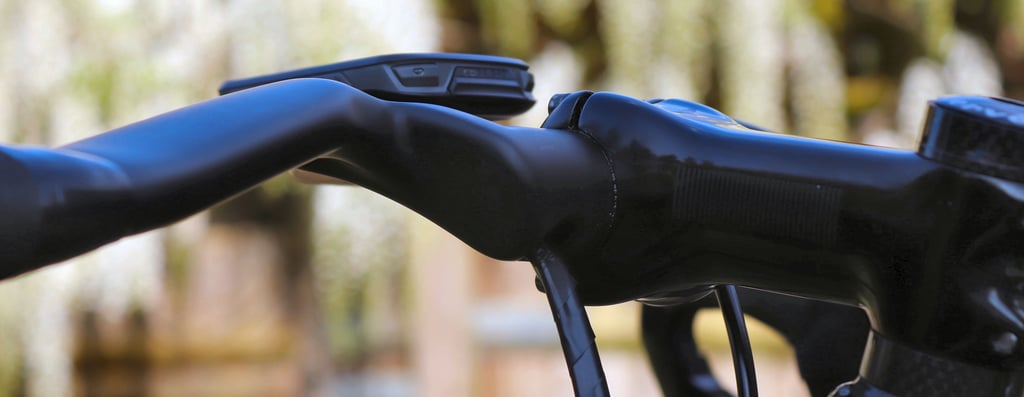
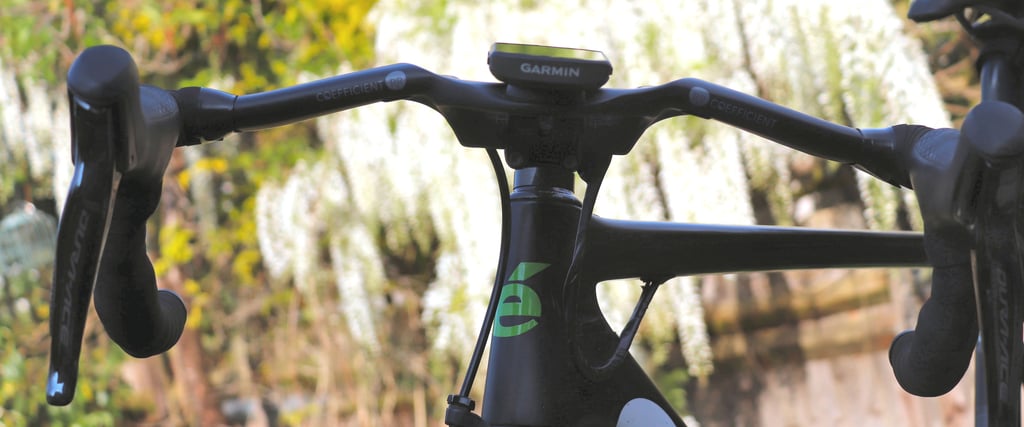
The company highlights its SWOPE and FLARE geometry meaning that the tops slope down and back and the drops flare out to your side, it seems that wherever you choose to put your hands there is something either subtly or manifestly different and better when compared to regular bars.

Coefficient Cycling Bars – Fitting the RR Version
TL;DR – new bars with pre-fabricated wiring holes were my opportunity to tidy up my 11-speed Di2 wiring. Running the cables inside these bars is not easy but should accommodate most wiring/cable needs.
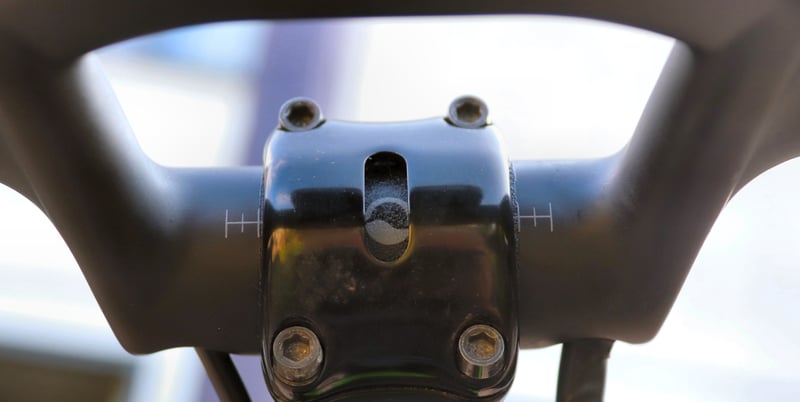
The RR (road) version of these bars requires your bike to have a regular stem and its dimensions mean you keep your existing stem length. Even though the top bars swoop backwards, their novel geometry starts from the position of your Garmin/Wahoo mounts rather than from the end of the stem
Any existing Di2 wires that you already have should swap over as-is but you will probably need slightly longer brake cables to deal with a slightly longer cable run than what you already have.

With that in mind it should be fairly obvious on the new positions of the bits from your old bars although, like me, you may be planning on taking advantage of more efficient and prettier cable routing options
Remember that all the cable runs you will make are fairly tricky although made easier as the bars come with some pull-throughs already in place.
Here are some points and learnings from my Di2 re-wiring
- My final Di2 wiring scheme ended up looking neat. For the R5, it was possible to run the single Di2 cable alongside the rear brake cable to the 4-port junction via a single hole in the frame under the top tube. Afterwards, both cables can be wrapped together with a heat-shrinkable sleeve, but I just used insulation tape for now. If that leaves you with an unused Di2 entry hole in your top tube, you may need to plug it with a Di2 frame grommet, a better option would be a SRAM wireless grommet as it would have no holes. However, I couldn’t find one, so I left the Di2 grommet in place as it only has one small hole, unlike other grommets that have a hole for the rear brake and rear gear cable.
- You can run a cable from any hole to any other hole. However, to go from the left side to the right side, you need to use the larger section near the stem. It doesn’t appear possible to route the apparently shorter internal route underneath the Garmin/Wahoo Mount. There might be space for a Di2 wire there, or it might simply not be hollow.
- It doesn’t seem possible to place a Di2 junction box anywhere inside the handlebars, except inside the bar ends. Using a Y-wire splitter for 4 shifters is recommended instead.
- If you’re not sure how you should wire Di2 then this diagram suggests a setup that definitely works and you can plug an optional Bluetooth module into the spare socket of the Charging Port on the bar end.
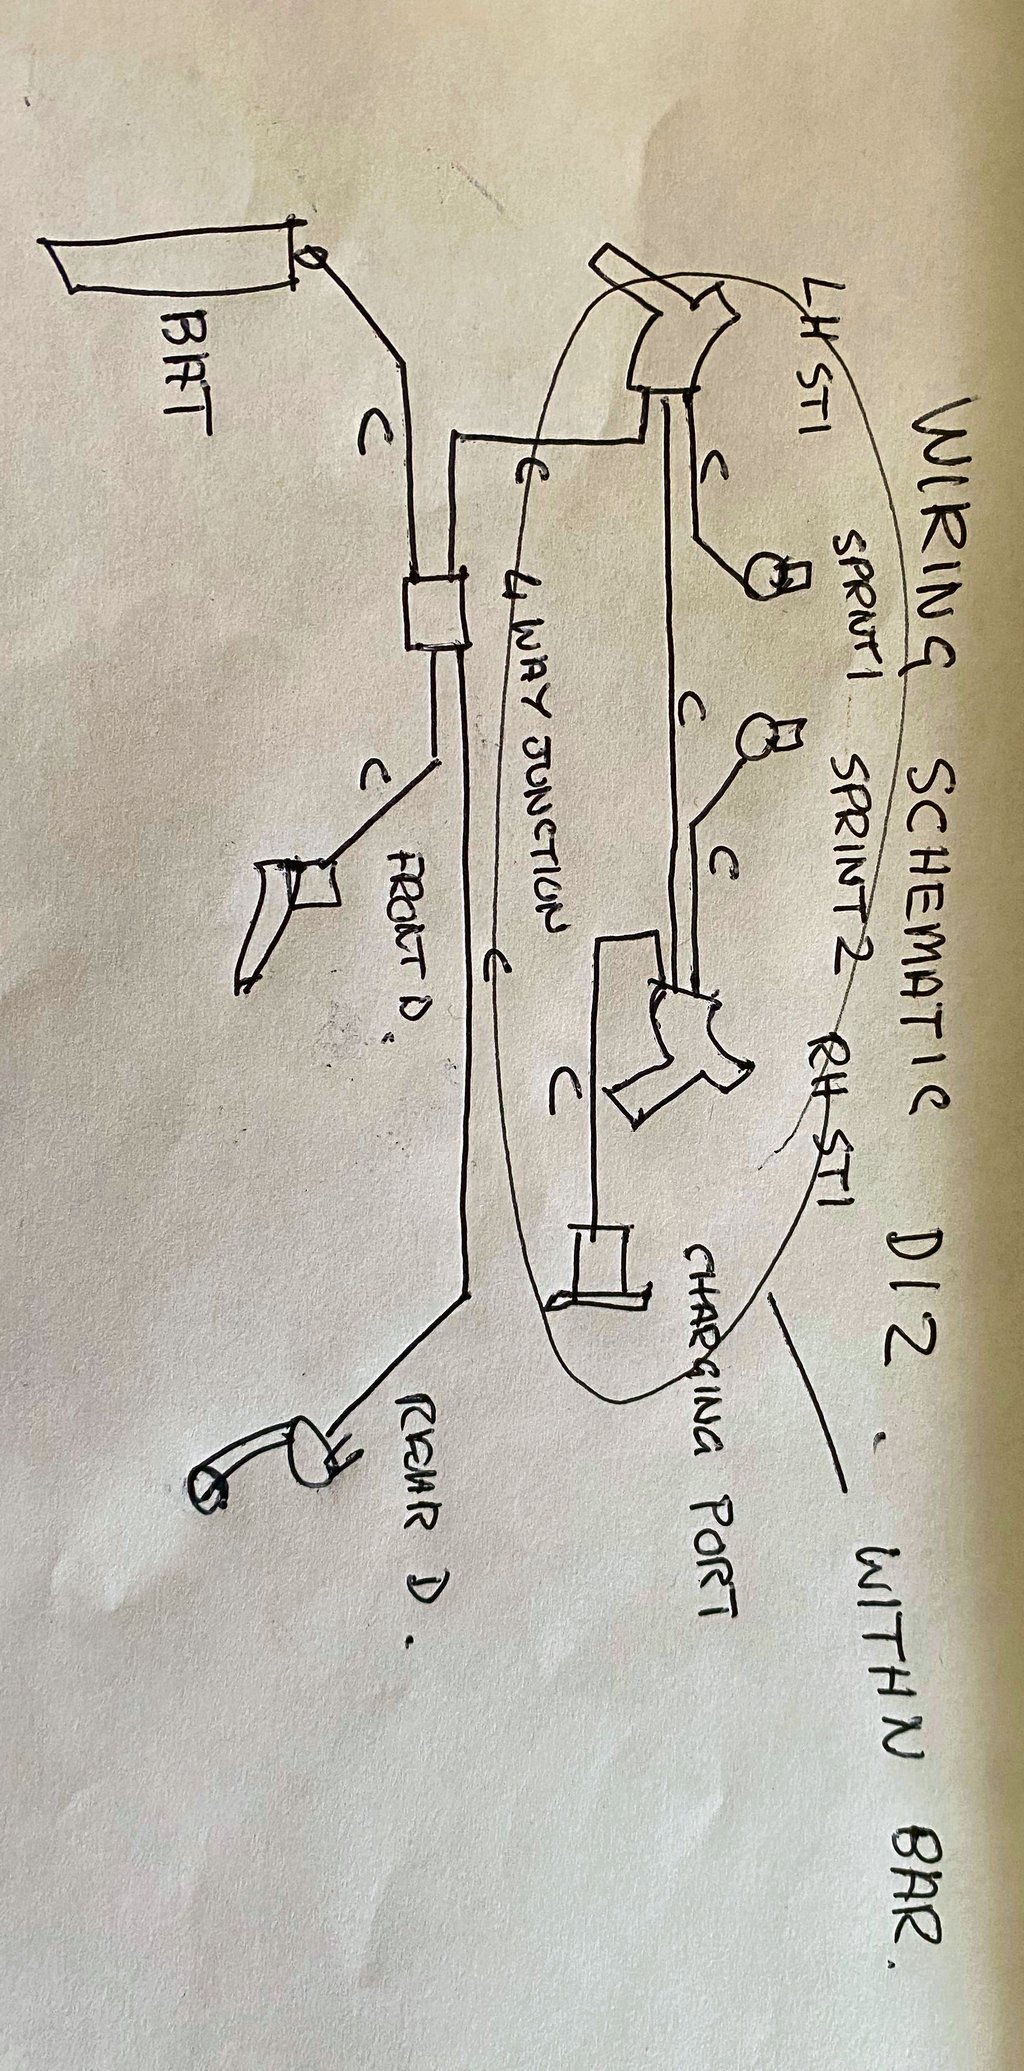
- There are holes available to accommodate at least 4 sprint/satellite shifters.
- It should be simple to wire two of those directly from your Di2 levers.
- The optional E-TUBE Wireless Unit D-FLY 2-Port Bluetooth Junction can fit anywhere in line with your Di2 wiring. Placing the D-FLY unit inside the bar tops is not possible. Alternative locations that work are the bar ends and inline near the bottom bracket.
- Di2 wiring for 12-speed is much simpler, and you would only need a wire from your levers to the sprint satellite shifters. Otherwise, 12-speed is essentially wireless on the bars.
- I have the latest iteration of the 11-speed Di2 Dura-Ace shifters. These shifters definitely have 2+1 Di2 ports. The 2 ports can be used for anything, but the +1 port will only link to a satellite/sprint shifter.
- It didn’t seem to matter whether I pulled the larger brake cable through first and then the Di2 cables or the other way around. It was equally difficult either way, as there is a 90-degree internal bend to accommodate. Using an old gear or brake cable as a pull-through is recommended.
- The coefficient bars have a hole for fully hidden cable routing through the stem. However, you need to have a bike frame and stem that can accommodate this. Unfortunately, I didn’t have such a setup. Do not attempt to drill any holes anywhere in an effort to use hidden cabling routes and be clever. (I considered it)
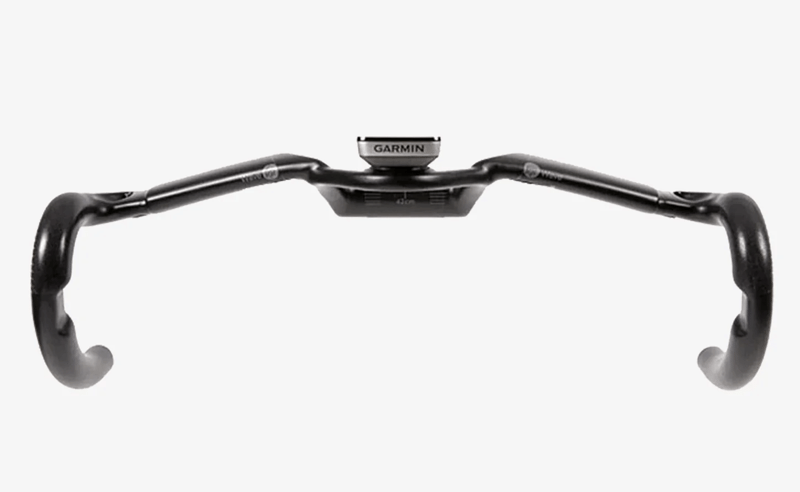
Coefficient Cycling RR Handlebars specs
Here are the Coefficient Cycling RR Handlebars specs.
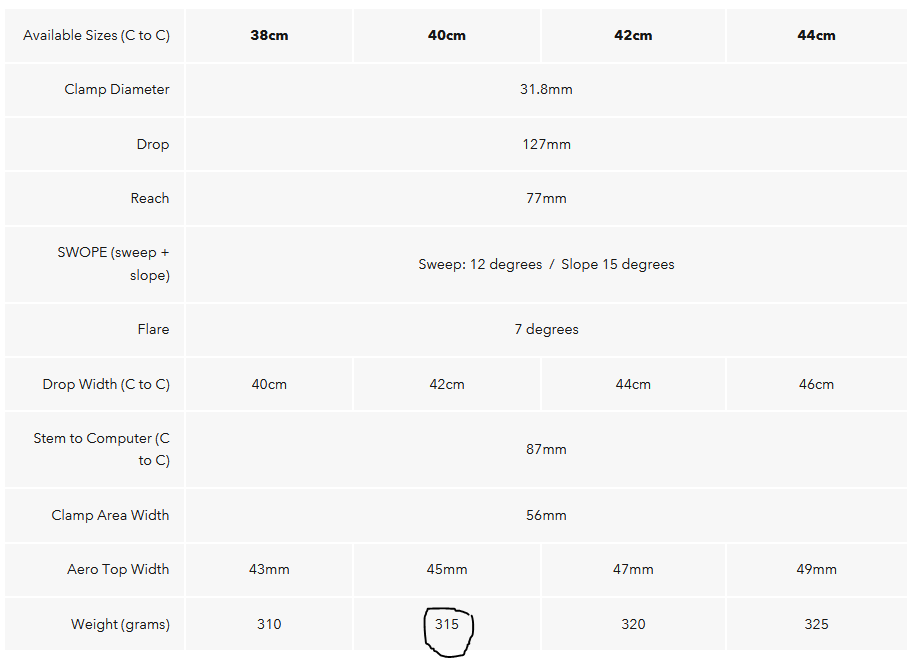
It’s worth noting the bars sweep back towards the rider and slope toward the ground, these SWOPE figures are shown above. The FLARE measurement describes how the ends of the bars point out from the bike’s direction of travel, in this case, 7 degrees. whilst some of the handlebar characteristics are to get more aero riding positions, other characteristics are specifically for ergonomics – comfort & control.
The handlebar width is important for comfort and speed, it’s measured from centre to centre (C to C). I stuck with my existing 40cm width even though a 38cm width would probably save me a watt or so.
Turning to weight by way of an example, the Zip SL70 bars weigh 240g (42cm version) but you would have to add in 65-75g for the weight of a barfly mount to get a comparable weight figure. That still makes the 42mm Coeffcieint bars slightly heavier at 320g. The Coefficient bar’s weight includes the weight of the mount.
coefficient handlebars Aero claims
The company does not make any formal claims about drag reduction although I have heard they compare favourably to Zipp’s Sl70.
![]()
The Zipp Sl70 claims to save 6.4 watts of drag over regular round tubed bars. If I factor in my now much tidier wires plus any aero gain from the flat tops, it’s not beyond the realms of possibility for me to have saved 5-10w when travelling at a half-decent speed compared to my previous bars.
I have done some good times on some of my favourite local loops and segments. However, I’ve also lowered the bars compared to my previous setup which is more aero so that could easily have accounted for any better time. My TT bike with aerobars is still considerably faster over the same segments!

Stiffness
The bars do not feel stiff vertically and hence give a degree of comfort, however, they are very stiff and resist compression from the sides
Common Handlebar Riding Positions – How the Coefficient bars felt.
I want to say straight up that these bars a noticeably more comfortable than standard bars and they offer more ergonomic riding positions than standard bars.
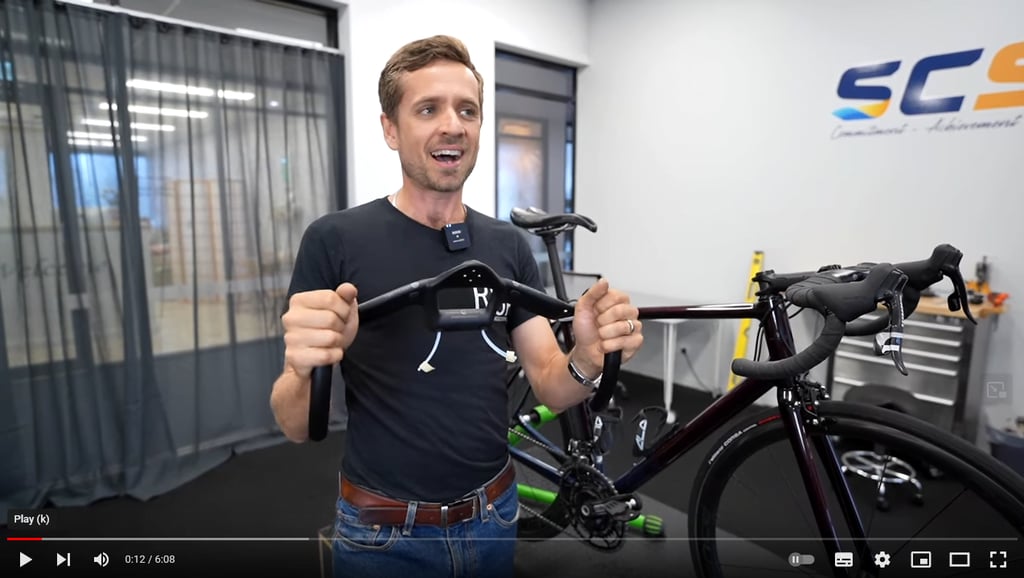
If yet another reviewer (me) claims that something is the best thing since sliced bread perhaps that won’t convince you of the voracity of the statements made. Anyway, I’ll still say it, they really are EXCELLENT. As a backup to my opinion, check out this video from Neill Stanbury from Road Cycling Academy (RCA). He is a good presenter and bike fitter and, indeed, the RCA cycling channel is also extremely high quality. A bit like a less funny and more focused version of GCN, also check out their nutritional presenter Steph who knows her stuff and talks 100% sense in a concise way. These guys deal with pro cyclists on a regular basis.
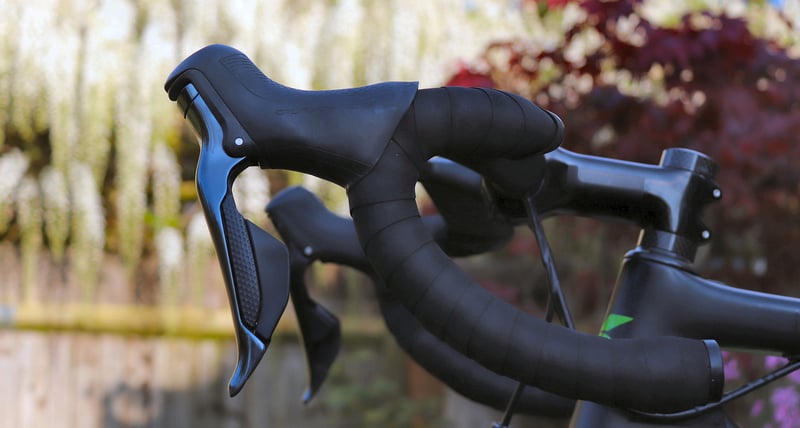
Riding Position #1 – The Hoods
The “hoods” position, where your hands rest on the brake hoods, is probably the standard for riding with drop bars. It’s ergonomic, distributes weight well, and provides decent leverage at all speeds.

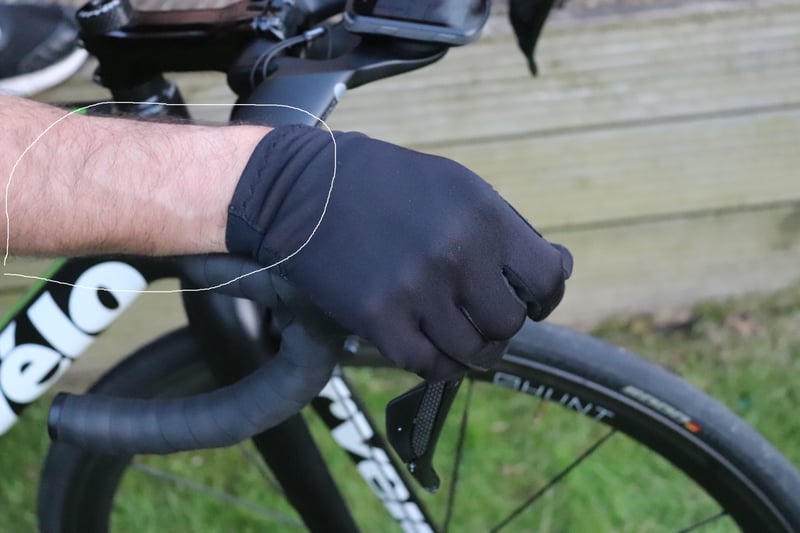
The brake levers are easily accessible from this position, indeed a minor variant of the position is to ride with a finger or two on the lever, enabling more responsive braking. A further option is to bend your elbows more and flatten your forearm with the same hand position which would be more aero.
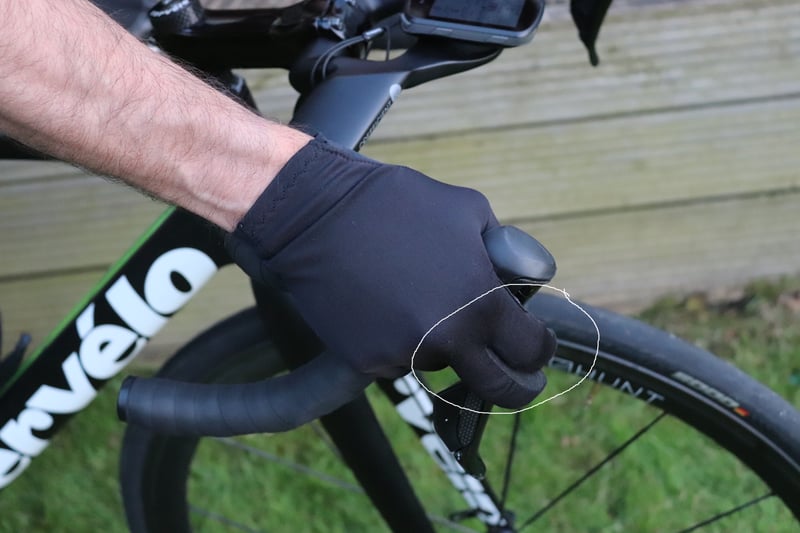
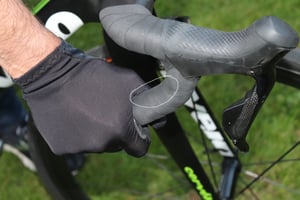
Riding Position #2 –The Drops
This position is perhaps more correctly known as “the hooks” and involves holding the curved parts of the bars, optionally with a finger or two on the levers. Pros spend considerably more time in this position than you or I.
This position might offer more leveraged braking but I suspect that makes little difference with modern brake tech, the most important aspect of this position is that it is probably the most aerodynamic for most people, although difficult to sustain unless you train in the same position.
I find this is a good position made more aerodynamic by bending the elbows more.
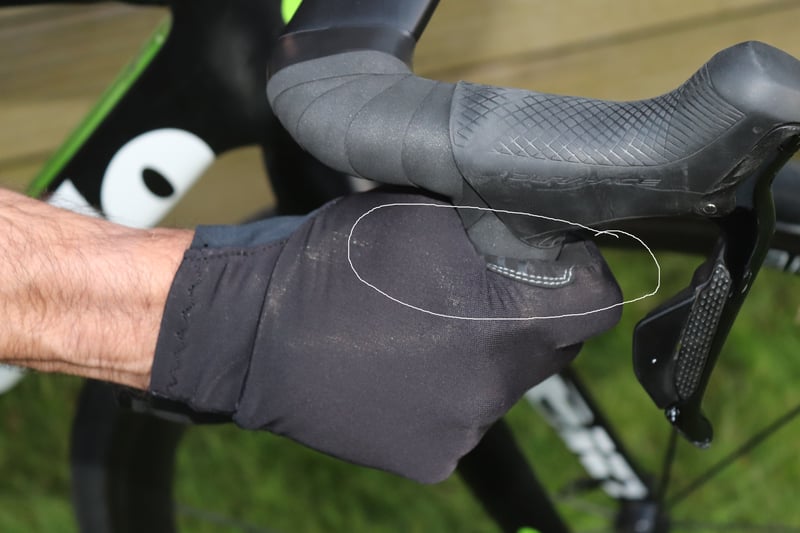
Coefficient adds a notch on the inside of the bar’s curve for this riding position that better accommodates one or two of your fingers. It does feel slightly more comfortable and a fair bit more secure.
Riding Position #3 – True Drops
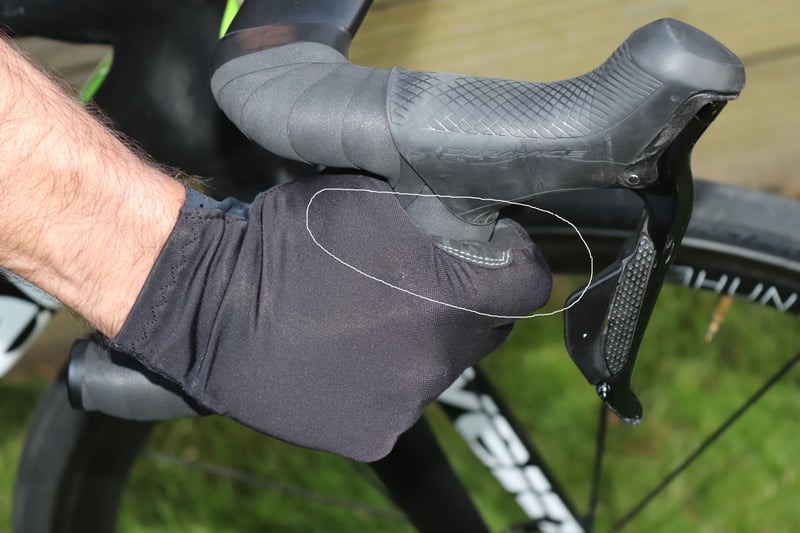
Riding Position #4 – The Tops
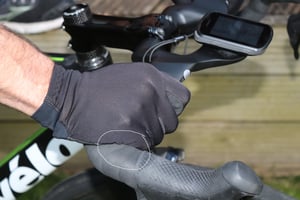
- The backwards sweep of the top tube is much more comfortable and natural. The position naturally encourages your elbows to go in towards your body
- A ‘notch’ is on either side of your thumb, giving better grip and control.
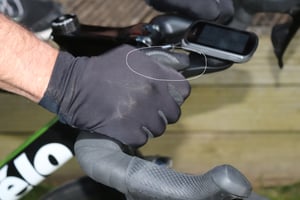
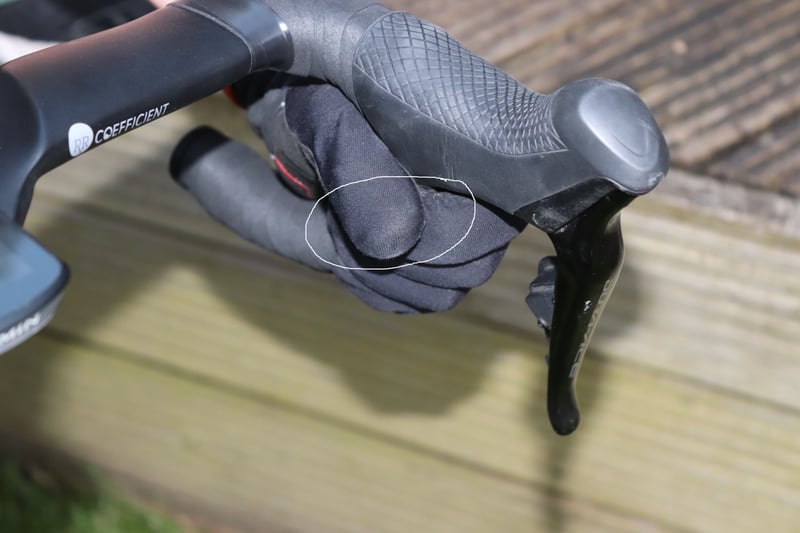
Riding Position #5 – The Ramps
The ramps involve holding the corners of the top portion of the handlebars, it’s a more upright position than riding on the hoods and doesn’t offer too many advantages other than a bit of variety
Riding Position #6 – Tucked Aero Tops

Riding Position #7 – Aero Bars or clip ons
Coefficient Cycling RR Bars – Summary Review
I like everything about these bars.
Looks. Comfort. Aeroness. Position. Compatibility.
OK, they are a bit expensive and a faff to wire up but those are mere small-scale annoyances right at the start of your many thousand-mile journey with some great handlebars.
More: Price is North of €/£/$300. Shop around for a deal or go direct – Coefficient Cycling
Last Updated on 27 January 2026 by the5krunner
My favourite kit and nutrition
- Injinji – Runners protect your toes. Avoid discomfort and minor injury. Run more. run faster. I use them.
- Garmin 90-degree charging adapter — the small adapter that keeps your charging cables tidy. Essential for race day. I use one.
- Garmin charging puck — the fastest and most reliable way to top up your Garmin before a session. I use one.
- Ravemen FR300 — front light that mounts directly under your Garmin or Wahoo head unit. Keeps your bars clean and your beam pointed where it matters. I use one.
- Body Glide – The Blue anti-chafe stick that all swimmers and many runners use. I use it.
- Maurten — the race nutrition trusted by elite athletes. Gels and drink mix engineered to be easy on the stomach. I use them.
- Garmin Varia RTL515 — radar rear light that alerts you to vehicles approaching from behind. Pairs with your Edge or Garmin watch. I use this model.
- Favero Assioma Pro RS2 — the power meter pedals most serious cyclists end up choosing. Accurate, easy to move between bikes. I use this model.
Reader-Powered Content

This content is not sponsored. It’s mostly me behind the labour of love, which is this site, and I appreciate everyone who supports it.
Support the site: Follow (free, fewer ads) · Subscribe (paid, ad-free) · Buy Me A Coffee ❤️
All articles are written by real people, fact-checked, and verified for originality. See the Editorial Policy. FTC: Affiliate Disclosure — some links pay commission. As an Amazon Associate, I earn from qualifying purchases.

tfk is the founder and author of the5krunner, an independent endurance sports technology publication. With 20 years of hands-on testing of GPS watches and wearables, and competing in triathlons at an international age-group level, tfk provides in-depth expert analysis of fitness technology for serious athletes and endurance sport competitors. ID

I wanted to buy them end of March and it was impossible kn Germany without importing them from the US (including customs wich would explode the price).
A month after I bought another one, one of my favorite dealers listed them.
Now I’m a bit annoyed and you only as to this because I want them even more, but will not do it because of the hustle to reword everything. ????
Hi
Could you please which dealer in Germany has them?
Veracity (truthiness, LOL) versus “voracity” (desire/ability to consume things).
Nice write up… have me thinking I may want to give these bars a try!
Any rider weight concerns/durability/longevity (not clear if these are particularly “lightweight built” or not, given the odd geometry/shape/size, split clamp area, hard to equate the weight to things like wall-thickness versus more traditional bars where “heavier is generally more durable)?
Always worry a little with so many “option holes” about stress risers when I’m 225#+ often during my rides.
What about now? Are you still using them? 🙂