This is sub-section of the mainreview. It covers the installation and calibration of the spindle, cranks and chainrings. Details will vary from bike-to-bike.
To return to the main review click (here).
Removing your existing spindle and cranks
This could be as simple as undoing a single bolt with an allen wrench/key. It was simple for me, although I had to undo two bolts with two allen keys.
It could, however, get fiendishly complex and require special tools if your bearings need removing for any reason. If in doubt just try and take it out before you buy the power meter. Keep all the spacers and note exactly in which order they go..
Installing the INPOWER 3D+
If you have all the right bits then you need to follow the instructions in the manual as spacers and washers will vary from frame to frame.
Here’s what I had to do on my 2010 specialized.
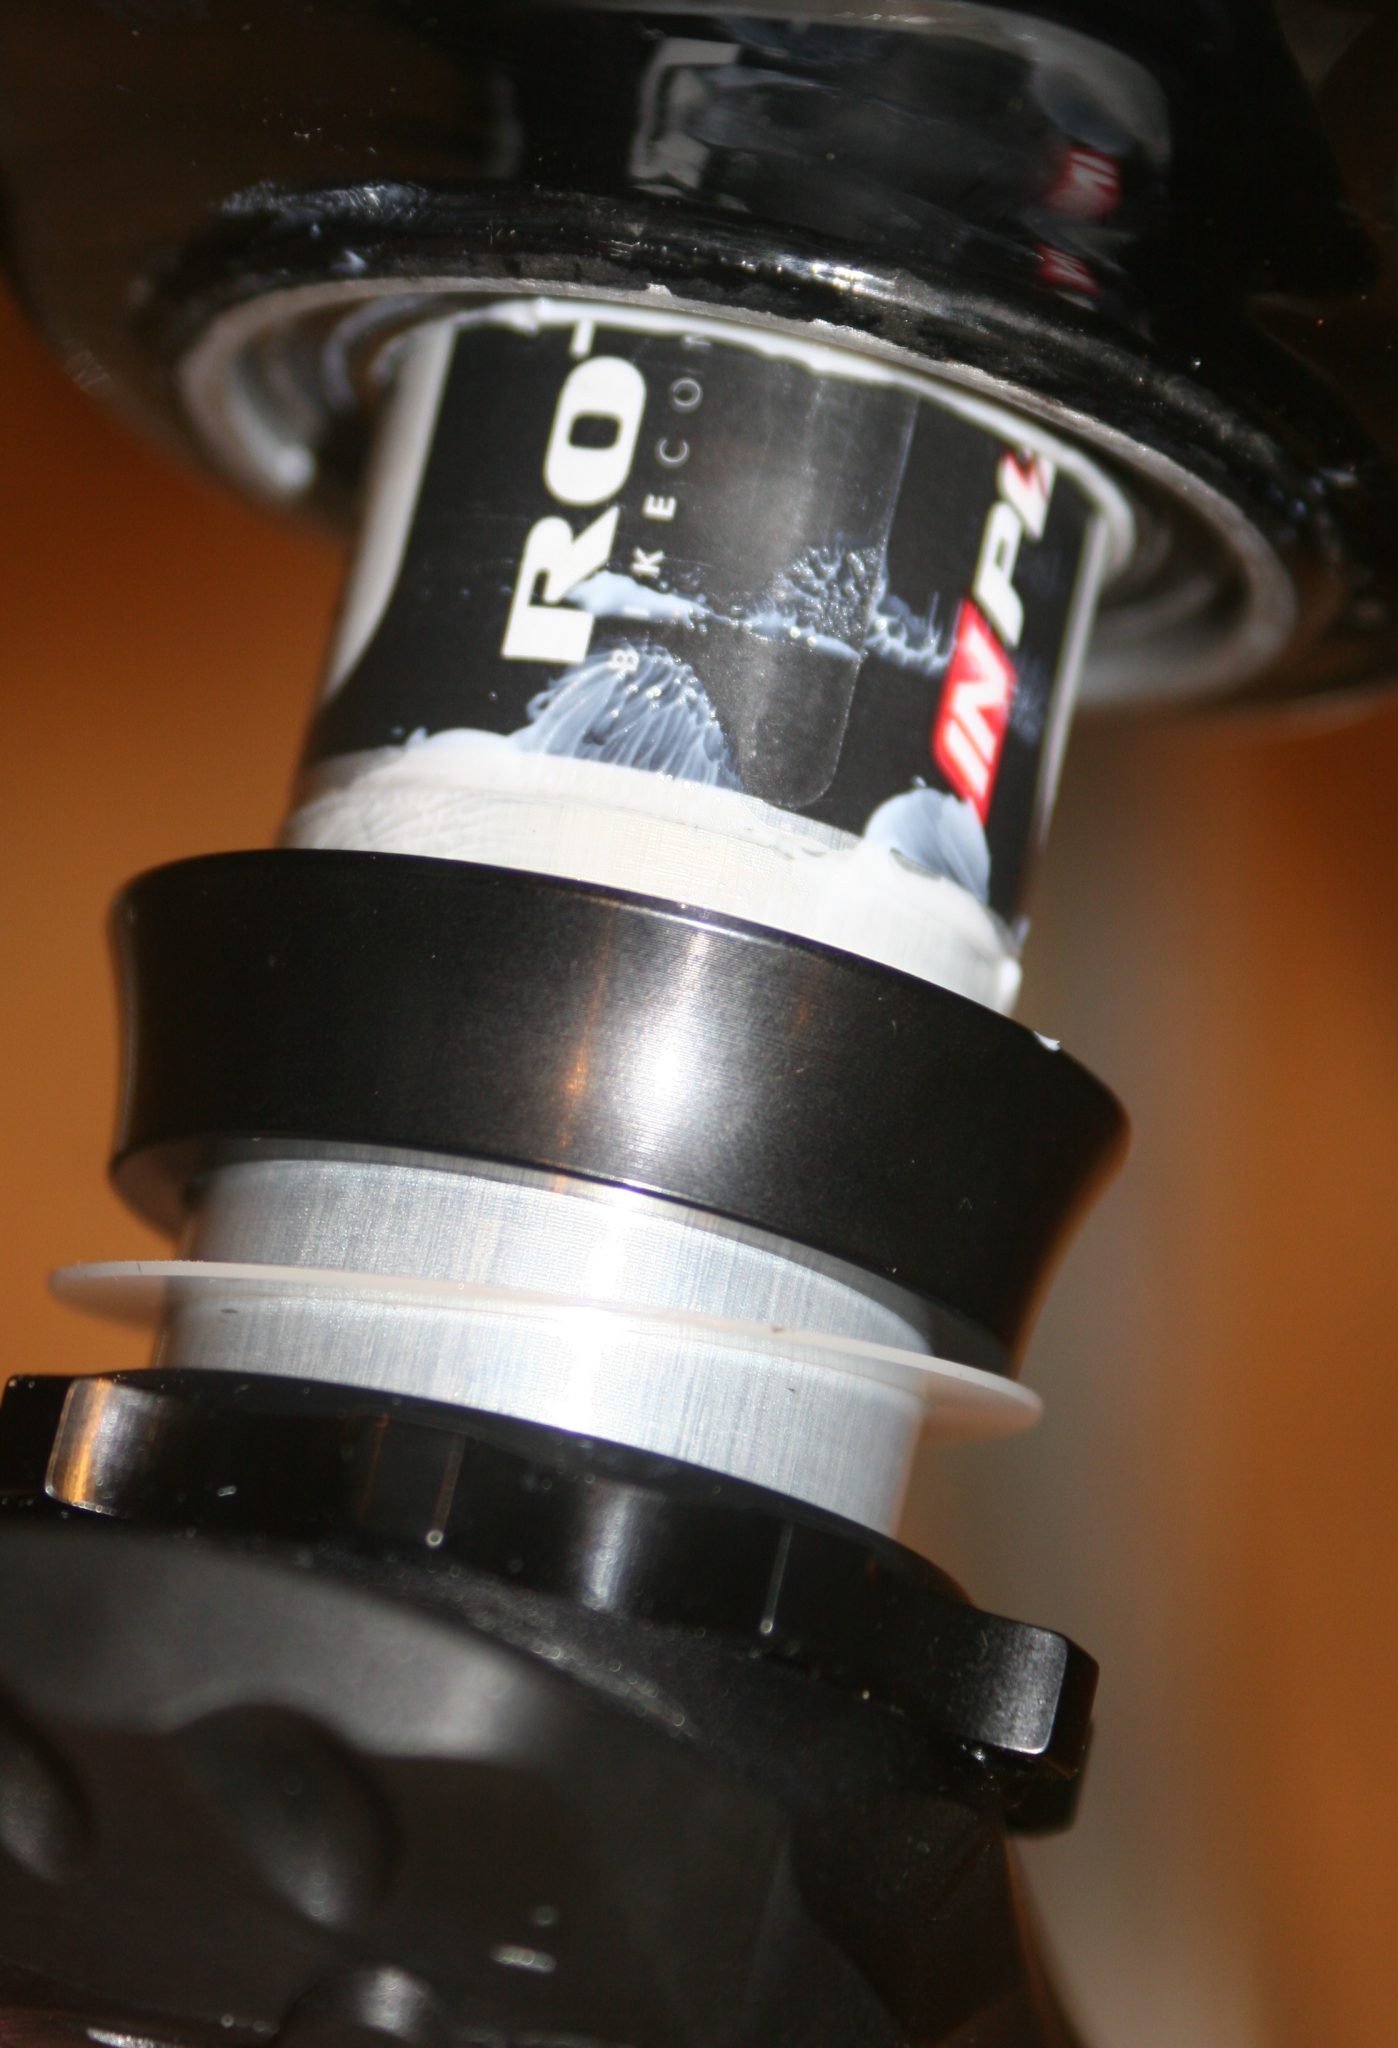
In the end I used two white spacers rather than the one shown below. The black spacer, or ‘cup’, touches the bearing on BOTH sides.
I found it a little tricky to get my old axle out but nothing that carefully focussed brute force would not overcome.
Ideally, like below, you will use anti seize paste when inserting the ROTOR axle/spindle – this is NOT JUST grease. When I come to remove the ROTOR in the future it should just slide out.
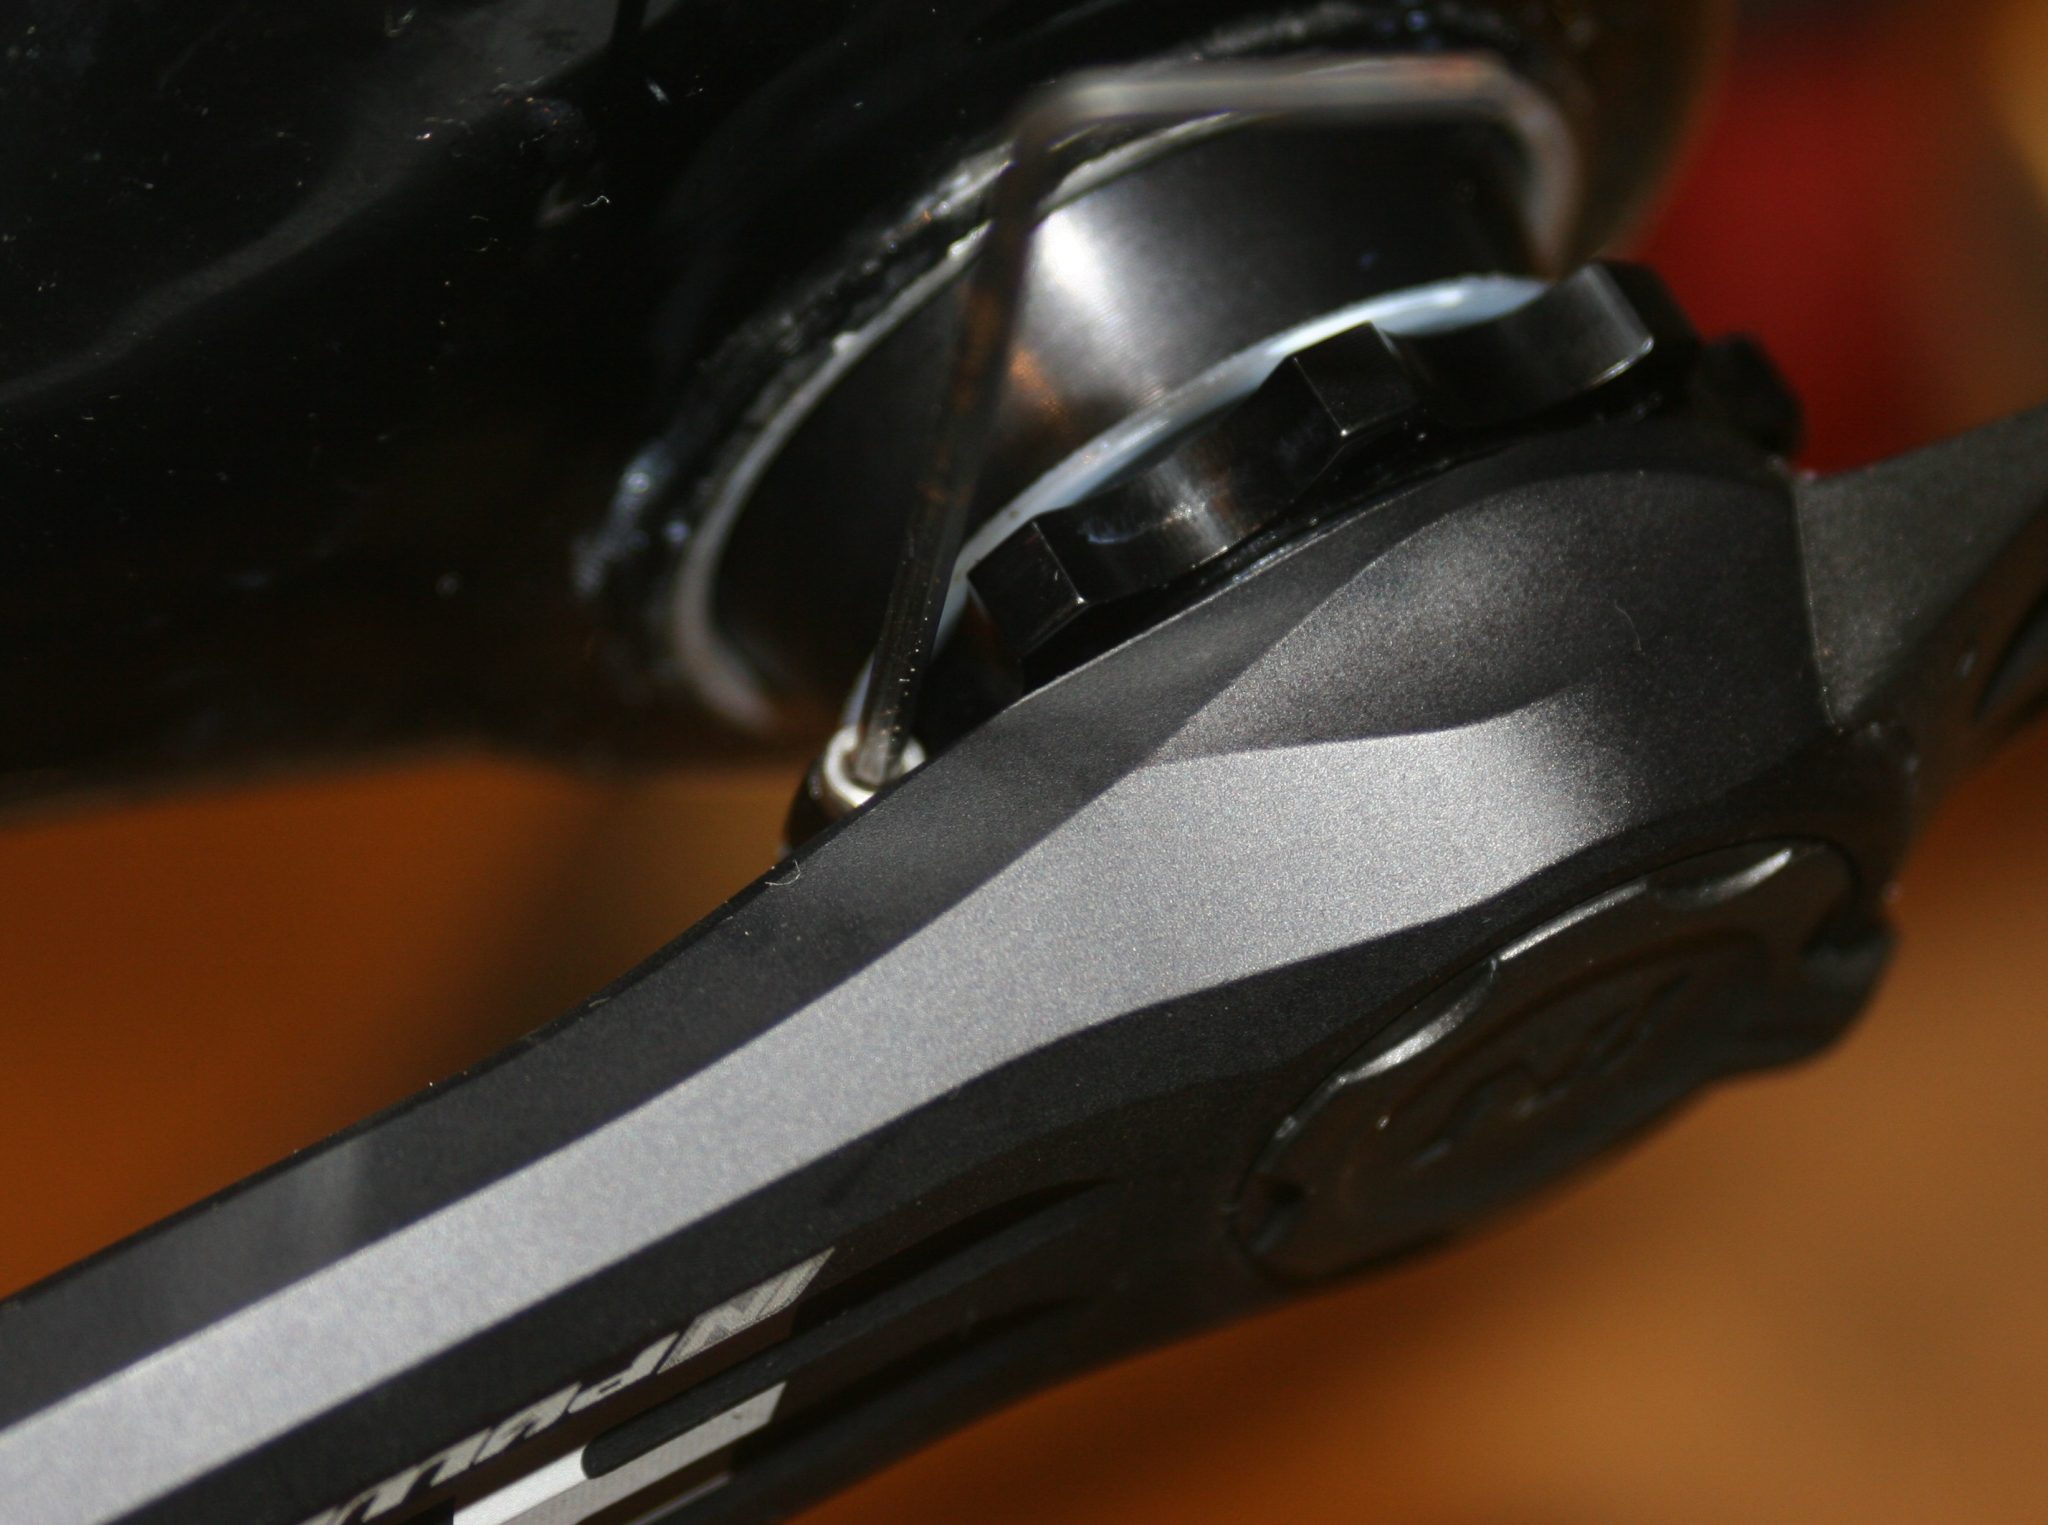
Stick the little chainring on the other side and then put the drive-side crank on. You’ll probably need a matching spacer on the drive-side BUT NOT A WASHER. If you put additional washers on the drive side you will affect the alignment of the chainrings. Don’t do that.
Then just tighten it up with the allen wrench/key as shown below. The exact torque is ‘Pretty tight’. (Make sure the battery is NOT in the power meter at this point).

If there is still lateral play then return to the non-drive side. Use a tiny 2mm allen key to undo the little silver nut. Then turn the big black knob to fill the gap. Re-tighten the allen key EXACTLY AS SHOWN with the long end and you’re done.
Simple. Now all we have to do now is power up the power meter, pair and calibrate it. But first it might help to finish putting the chainrings on.
Installing the elliptical chainrings
This is pretty simple too.
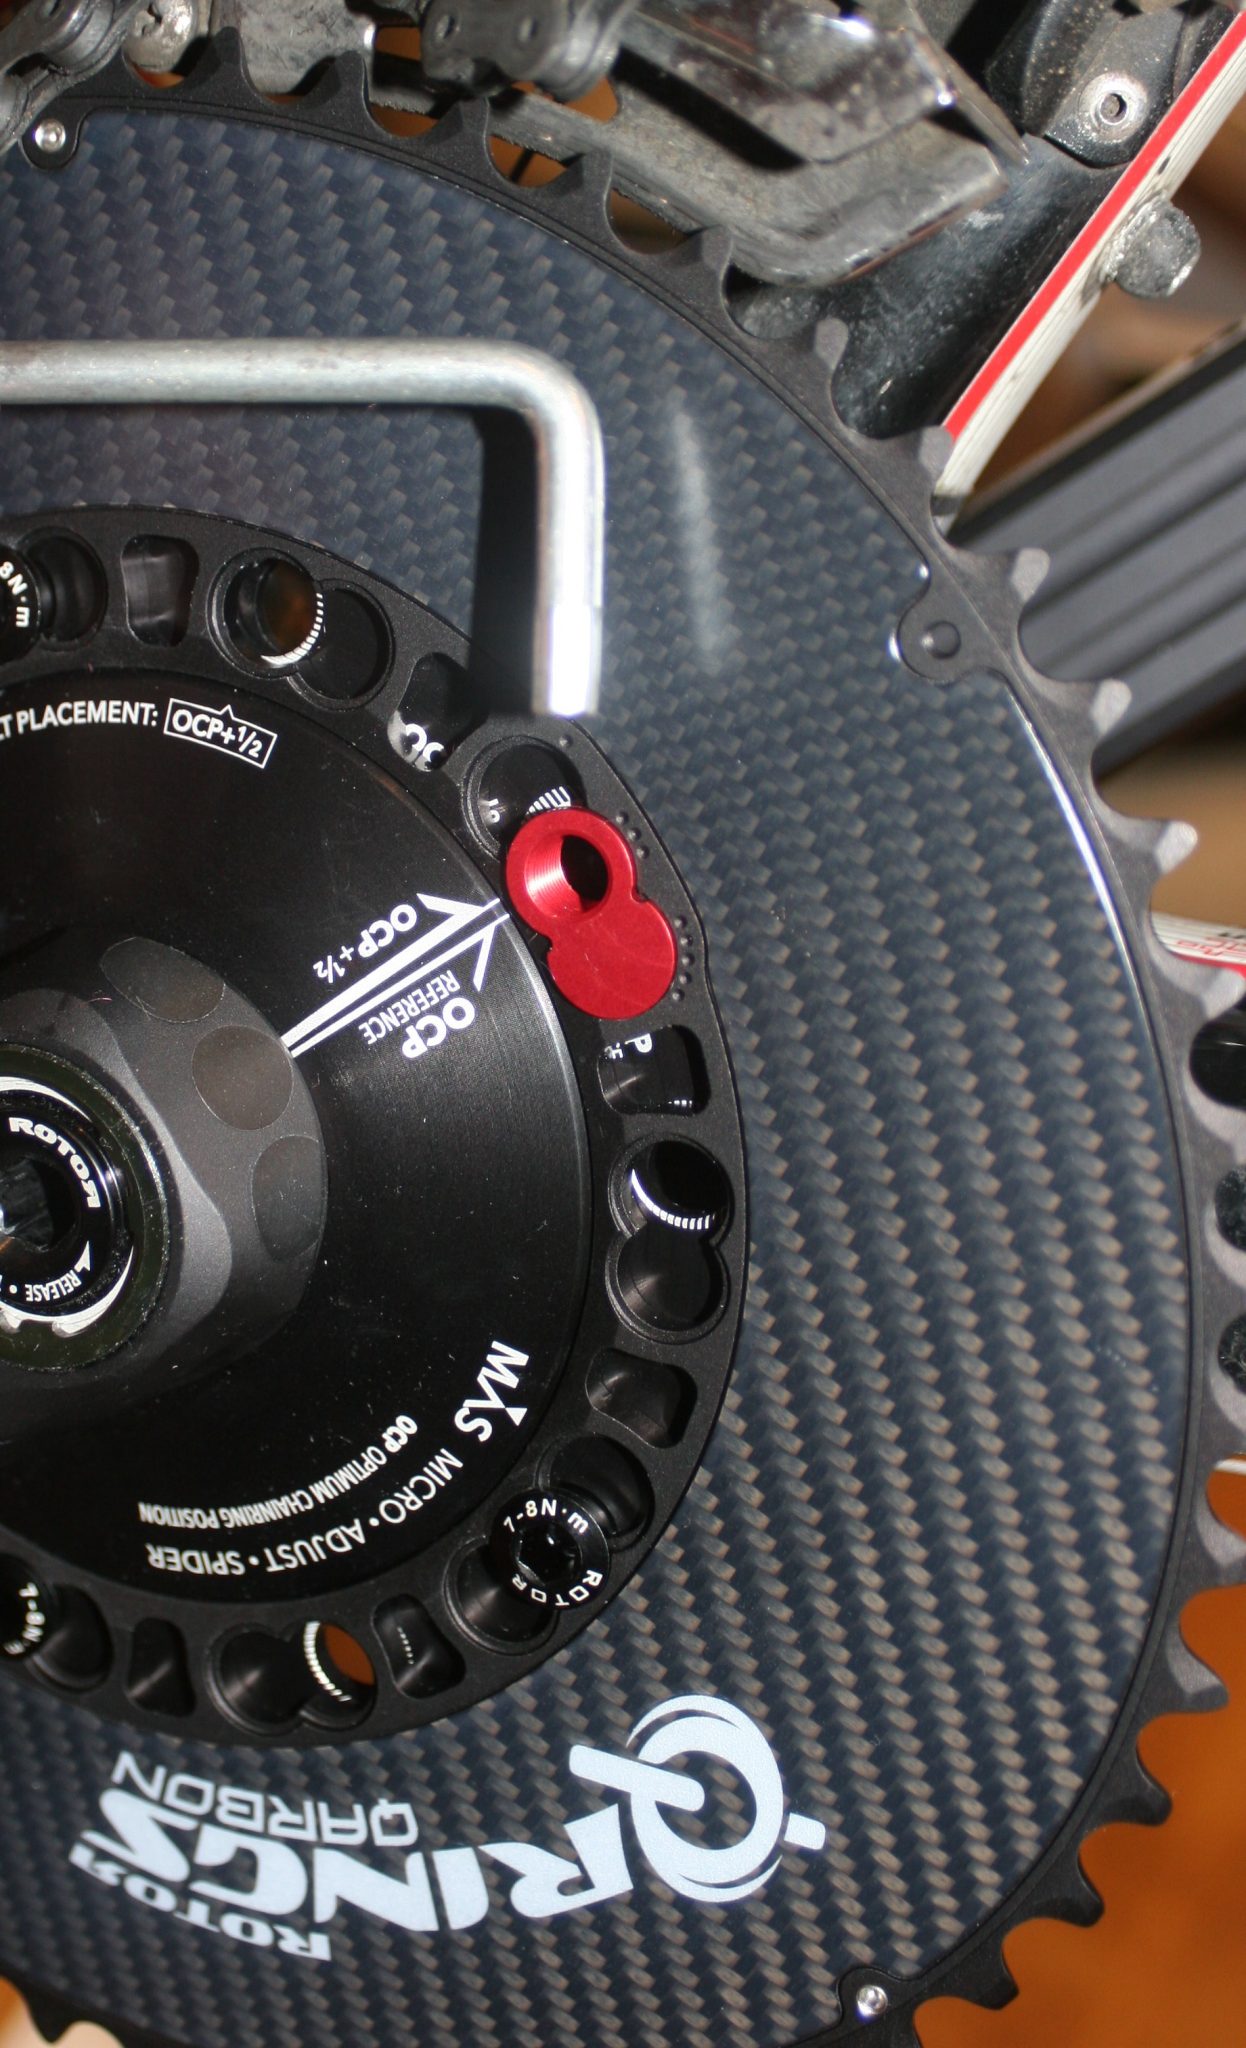
Start off by aligning to position ‘3’ , the 3 dots, near the red thing (image below). The double sided locking nuts come in 5 pairs and they will only go in 5 of the holes. You know what to do with the allen key.
The fancy red thing is really for use on the reverse side ie next to the small chain ring. It’s meant to be used when access is difficult in positions 2, 4 and some of the half positions which require tightening behind the crank.
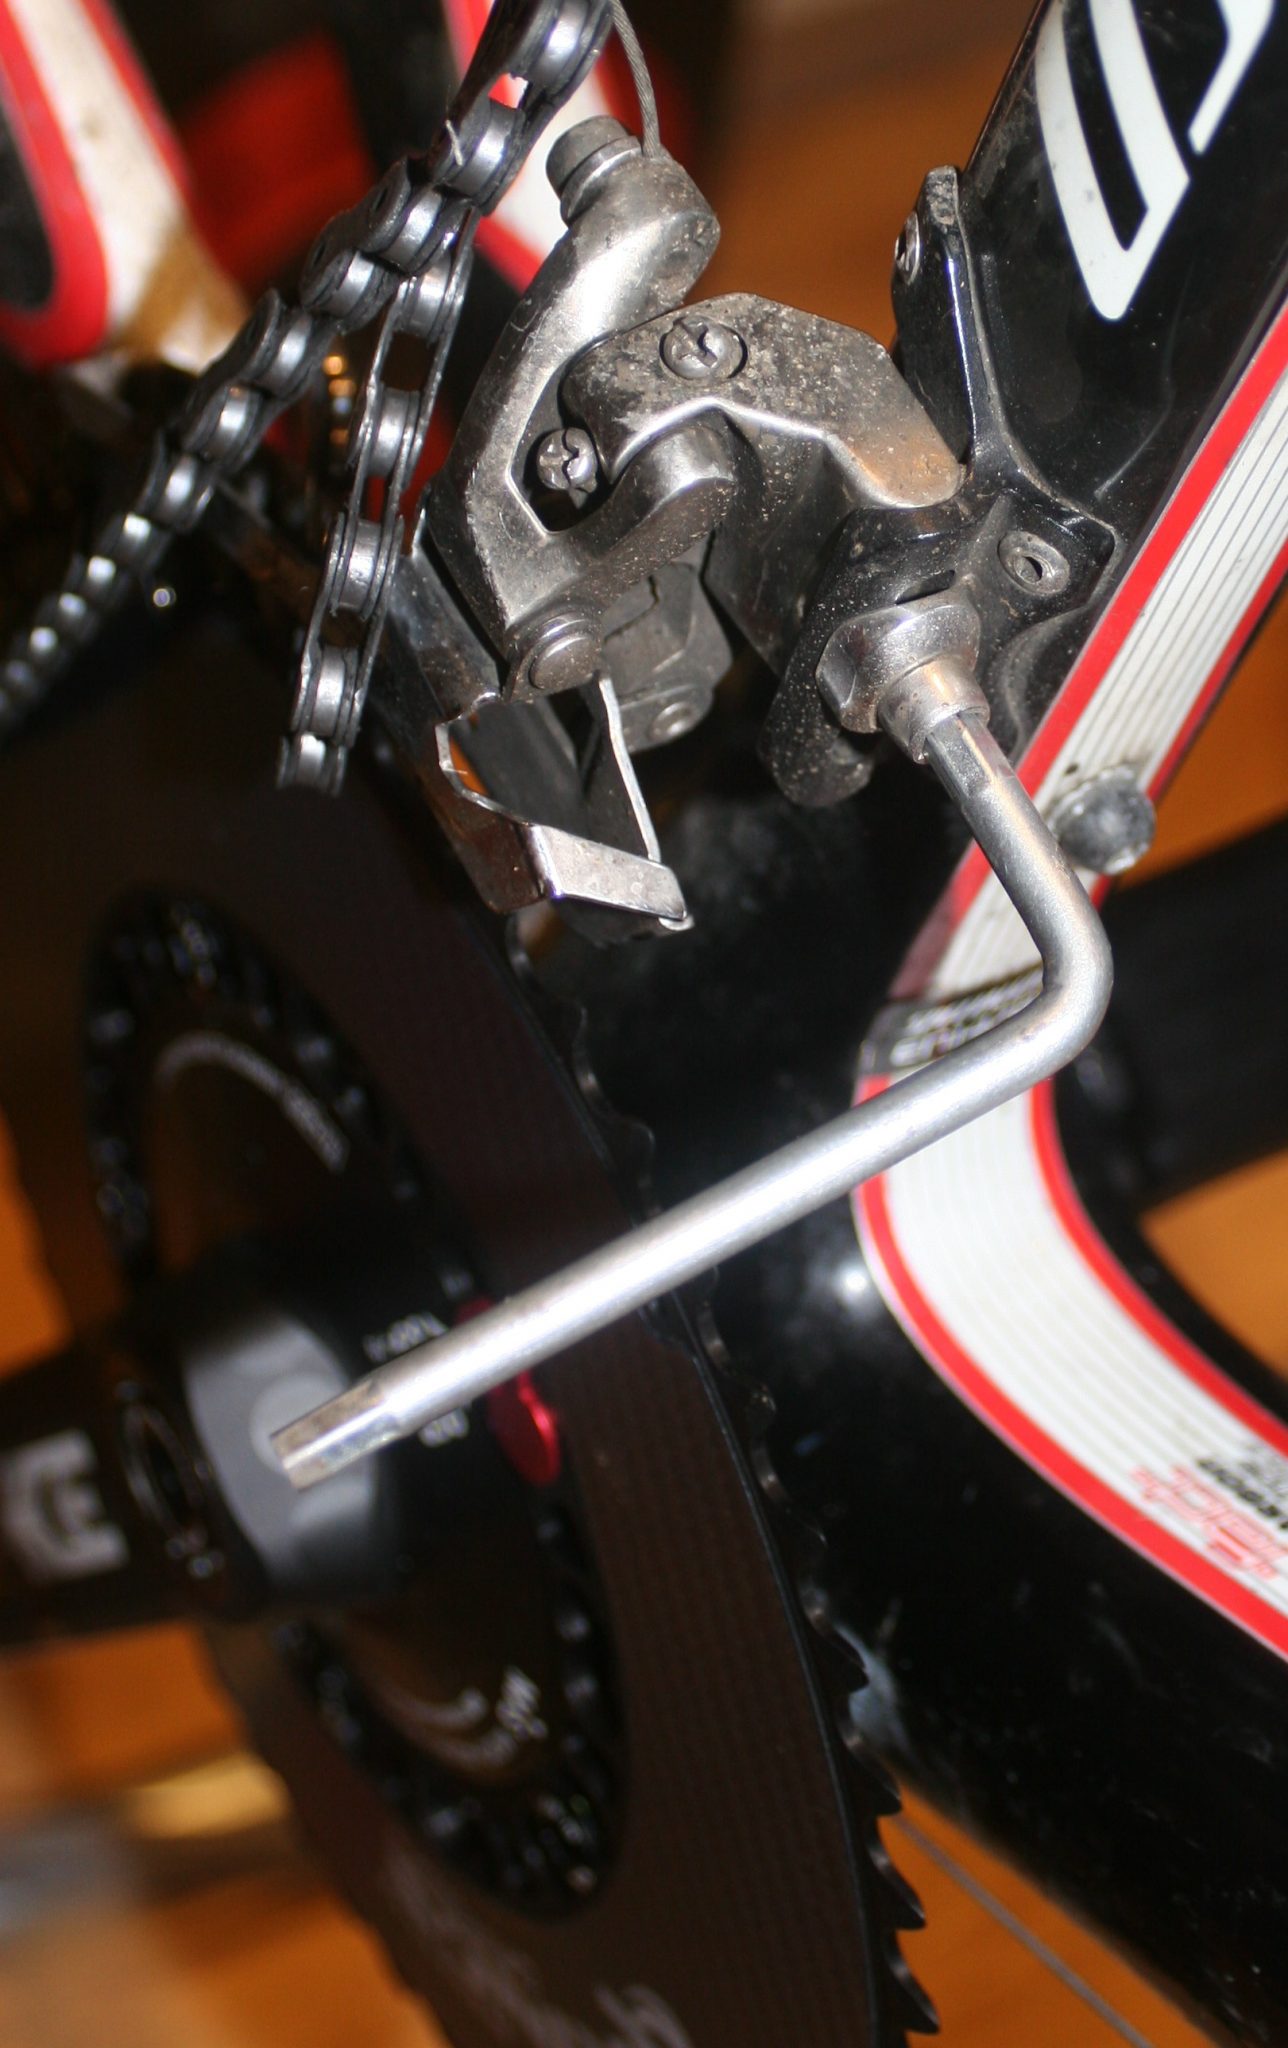
You will now find that you can’t change gear because of the extra height of the ellipse. Front derailleur adjustment is usually straightforward. You unbolt the cable AND the vertical position mechanism, as shown, and slide it up to give more space. In my limited experience with elliptical chainrings, you whack it up as high as it will go. Officially you need to leave 1.5mm to 2mm clearance of the mechanism from the large ring when in the small ring position (read that carefully).
By moving the derailleur mechanism higher you WILL need to retighten the gear cable in a different place and the limiting screws on the mechanism will need adjustment- looking at the picture below, the screw to the right does the small ring positioning.
Yeah OK, it’s hard to explain/ Look at this video instead.
https://www.youtube.com/watch?v=UpvRLATo6QM
Stick the pedals on and you are have a working bike…but no power meter yet.
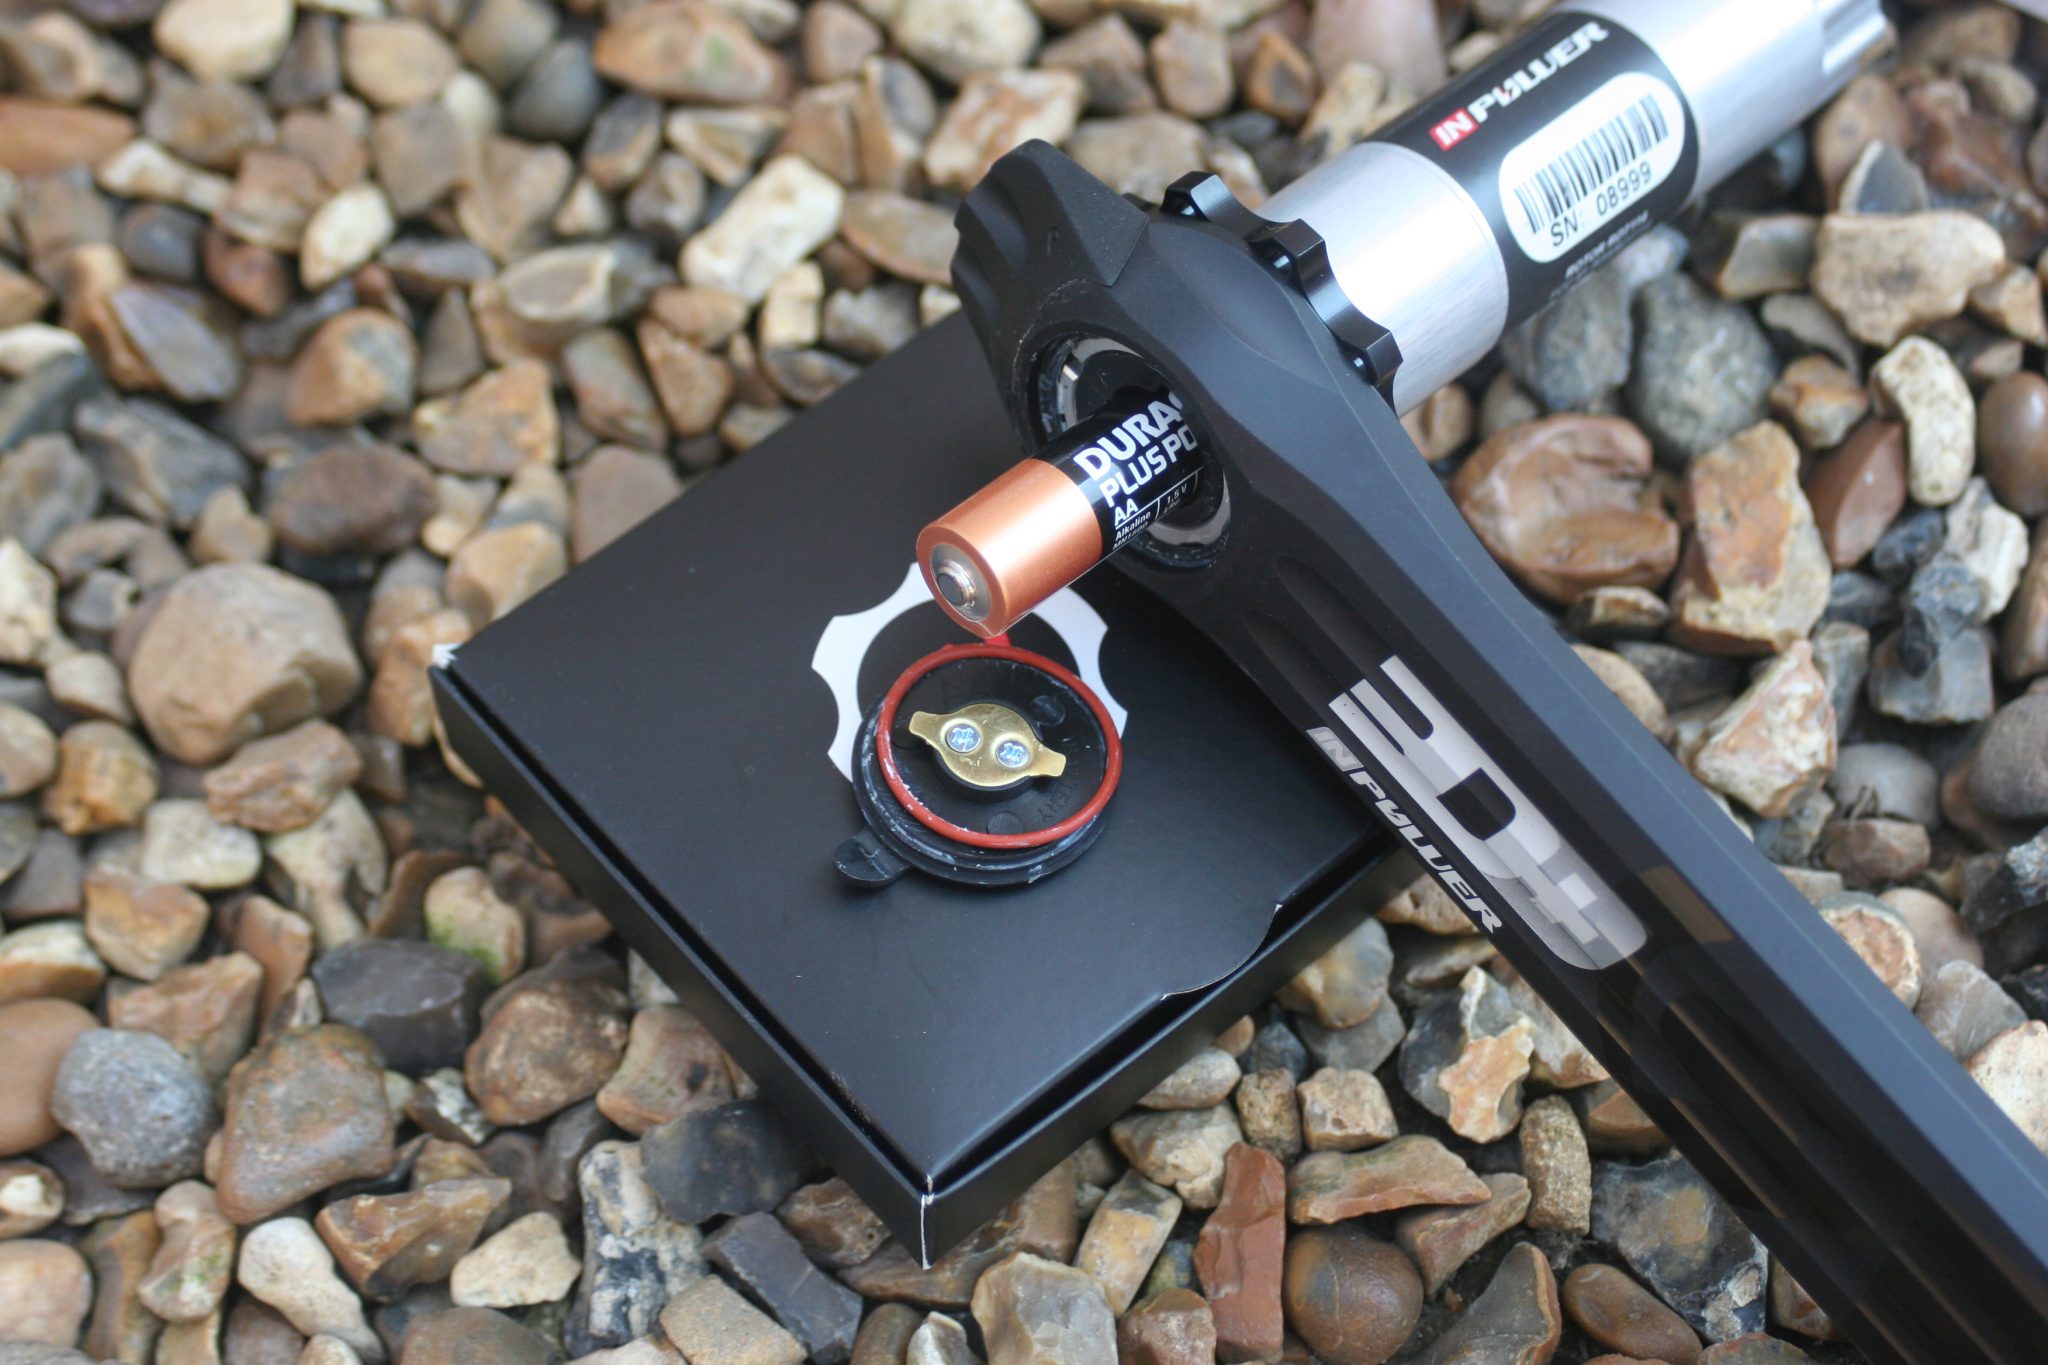
As shown before you want to put in a proper, new AA battery – not a LIDL own-brand. For the sake of less than a pound/dollar don’t faff about with rechargeable batteries or anything like that, just use a Energizer Ultimate Lithium – they are the best battery, better than Duracell. They WILL last longer, put a spare under your seat and you are always good-to-go.
The red O-ring seal is attached to the outside of the cover before being inserted. The cover should close fairly easily so don’t force it. It might be a good idea to use the anti-seize stuff you used earlier on the O-ring, it just might stop it degrading and sticking to the cover over time ie to avoid it breaking/degrading.
Pairing
Spin the cranks and pair the device just like any other power meter. Super Simple. You can enter the manual ANT+ number, I had to do that on the Lezyne.
Calibration
Calibration is an almost one-off exercise. Unlike many other power meters, calibration is NOT required before each use.
Exceptions to that rule are if you change the pedals/cranks OR chainrings AND after the first 20/30 hours or so of use.
With the power meter activated get off the bike and leave the non-driveside fully down at 6 o’clock. Calibrate on your head unit/watch. You should get 1000 as a result. Pedal backwards slowly by hand 3 complete revolutions and repeat the calibration you should get +/-200 and I got -15. Sorted!
You can see the results of the calibration and other parameters like battery status on the INpower Software, below, which you can download from <here> once you have registered. I used software v1.4.

Firmware
Once you have logged in to the INpower software then firmware can be downloaded as a file from <here>. The firmware is saved locally and then updated via the INpower Software (as shown above). I took a massive leap of firmware-faith and upgraded from v2.3 to v2.301 🙂 All was good.
To return to the main review click (here).
Last Updated on 23 January 2022 by the5krunner

tfk is the founder and author of the5krunner, an independent endurance sports technology publication. With 20 years of hands-on testing of GPS watches and wearables, and competing in triathlons at an international age-group level, tfk provides in-depth expert analysis of fitness technology for serious athletes and endurance sport competitors. ID

Hi, great review.
Have an issue, had to reinstall my power crank 2inpower. But I’m getting 0/100% on the balance.
Any idea’s why and any solutions you could help me with?
Thanks in advance.
Regards
Ally