 How Out of balance are your wheels?
Some wheels will come pre-balanced; almost certainly, yours are not balanced. The imbalance will likely be due to the asymmetry of weight around the wheel circumference, which will largely result from the weight of the valve stem, which all wheels have.
Removing your imbalance will give you a smoother ride and reduce component wear. There might be performance gains from more grip, reduced energy dissipation and decreased rolling resistance.
The downsides to balancing your wheels are time, cost and extra weight.
The size of My Problem
On my 82mm rimmed Hunt Wheels, I run 47g Aerthan TPU inners with a 100mm stem. The Aerothan SV20e version of the same 100mm and 40mm inner tubes are each rated at 45g, so I take from that the stem weight is the same regardless of length (hmmm). Googling around, I found 3-4g estimates for the weight of the valve and stem, whereas race-grade tubeless replacement valves start at 4g.
I reckon that most people’s imbalance will be between 5 and 10g per wheel.
So that will be the compensation you need for your wheels. In practical terms, that means adding an opposing weight to match the imbalance, so you must be prepared to add 5-10g of weight to the rim of your wheel. If you’ve bought race-grade, super-light wheels, you will be loathe to do that. At the same time, cheaper wheels and tubes/values will likely have a bigger problem with heavier weights required to compensate for heavier valves/stems. If you have used a metal valve extender in deep-rimmed wheels that could add even more of an imbalance.
Bear with me.
Let’s check out the effect of an imbalance.
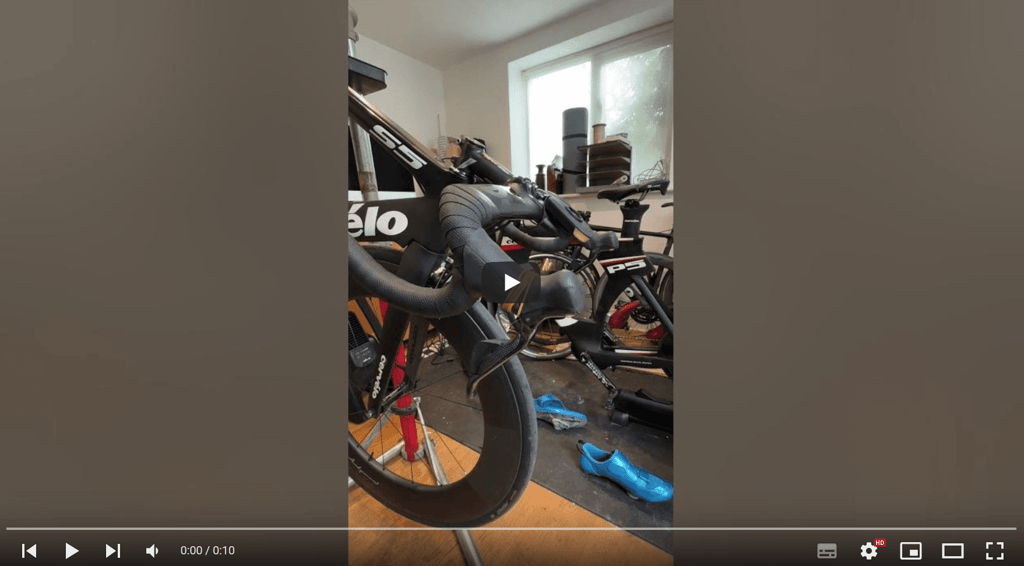
I put my bike in the stand and cranked the fastest gear by hand to about 25mph. Check out this video; it vibrates like crazy with the effect of one unbalanced wheel.
Why bother balancing your wheels?
I wanted a smooth ride. Balanced wheels will give you that.
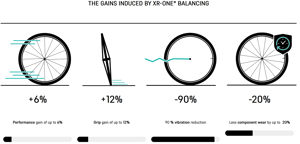
The more I looked into wheel balancing, the more I realised there might be more interesting gains to make. Legend Wheels claims up to 6% performance improvement in some scenarios, plus the potential to increase grip and reduce component wear. Vibrations will, of course, be reduced.

Anecdote: I have occasionally noticed odd vibrations and handling of my bike. Perhaps this is at a certain speed where it just so happens that both wheels are vibrating in sync. The effect of each wheel could compound the other, and there might be issues with resonant vibrations in the frame. All that is fine when you are grinding along at 20mph, but we all go downhill faster than that, and even gently leaning into an easy corner at 30-35mph leaves little room for error. Perhaps one day, those vibrations might push you toward a limit you weren’t expecting.
Other than the extra 5 grams of rotating weight per wheel, this is one of those ‘can’t hurt’ fixes to a problem you never knew you had.
Fixing The Problem
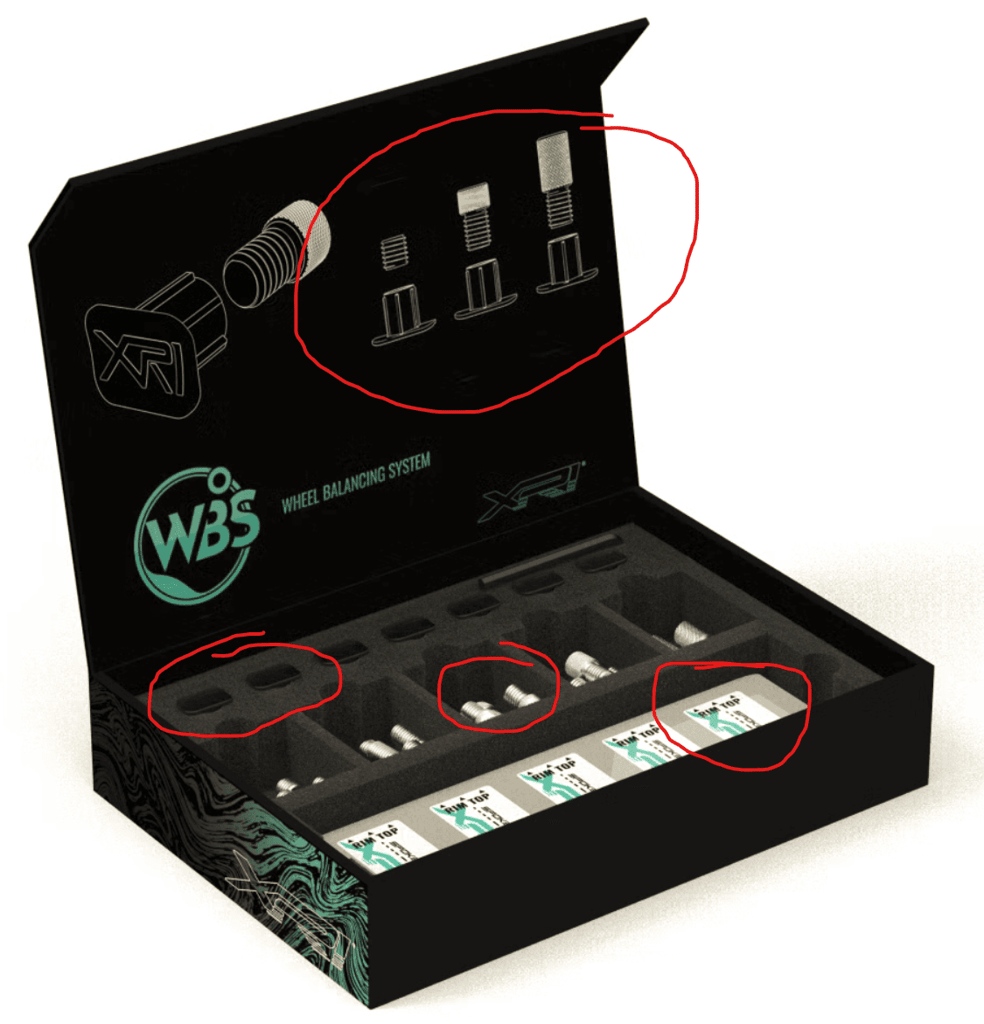
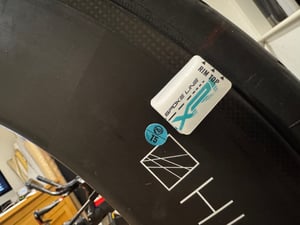
France’s Legend Wheels sent me a free wheel balancing kit that would otherwise cost 99.00€. If you are lucky, there might be enough bits to do four wheels, but they also sell a larger kit that WILL fix four wheels. If you buy a set, check with them so that it will work on your wheelset.
How it works: the company supplies weighted stickers, which you arrange on the outer side of the rim by a degree of trial and error so that the wheel does not rotate when the valve is positioned freely at 3 o’clock. Once you have determined the position and weights, add the same weight inside the rim and remove the stickers. Legend supplies cleverly weighted plugs that replace those you already have covering the spoke holes on the rim.
Ensure the tyre is re-fitted in the position you used when balancing (I marked the position before removing it). Typically, those with a tubeless setup need to remove all the sealant before starting.
Note: When you add new sealant to the wheel, it will be imbalanced when not moving. However, centripetal force will spread the sealant evenly inside your tyre when riding. I would imagine that parts of the sealant will accumulate in fixed positions over time, which will cause minor imbalances, and I don’t see how you can mitigate that.
Note: You might not have a single spoke precisely opposite the valve. You will add half the weight to each spoke on either side of your desired location.
Alternatives: You could place one of those old magnetless speed spoke sensors on a spoke roughly opposite your valve and hope for the best. I’ve seen mountain bikers clamp small lead fishing weights to spokes – it doesn’t look great, but I guess it does the job!
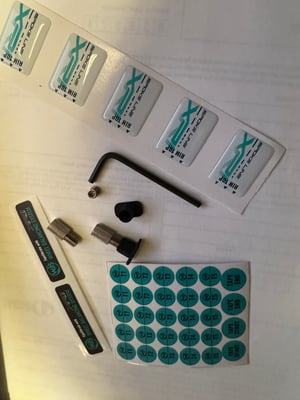
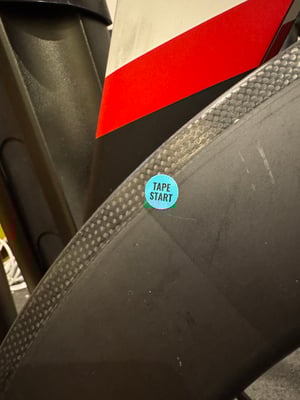
The kit has a few sets of stickers to help with the various tasks, and you might need to buy some new rim tape. Start and finish wrapping the rim tape exactly matching the one you removed.
Doing It
The guide supplied by Legend Wheels is fairly good but not foolproof.
Use a bike stand or turn your bike upside down to create a makeshift wheel stand. The front wheel will rotate smoothly for longer, but the rear wheel will only rotate freely on the bike with the cassette removed.
There are five different weights, increasing in length and mass from the shortest to the longest. The smallest corresponds to the weight of one sticker; the largest corresponds to the weight of 5 stickers.
It took an hour to adjust the front wheel; here was my method.
- (Remove the rear cassette), allow the wheel to rotate freely
- Use the stickers to determine the weight required to balance the wheel with the valve stem at 3 o’clock. When placed at this position, gravity should not rotate the wheel – this may be all you need to do.
- Check the balance at every other spoke position and add weights until it is perfectly balanced all the way around.
- Place one of the small circular stickers indicating the weight required at each spoke. I needed a 1g and 5g weight on the front wheel and 3g on the rear. The 1g weight for the front wheel had to be placed oddly at 4 o’clock, not opposite the valve stem.
- I used a pen to mark the position of two stickers on the tyre – I’d later use this mark to put the tyre back in an unchanged position.
- Mark the start and end position of the rim tape with the stickers provided as you peel it off.
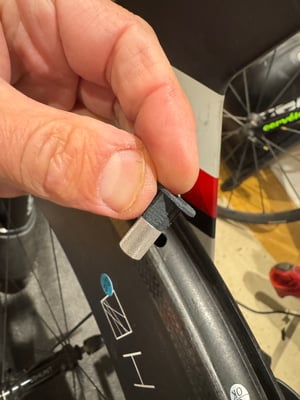
- Tightly screw in the metal weight to a hole cover cap. You’ll need an Allen key (provided) for the smallest weights, but the largest are tightened by hand. Insert into the hole.
- Add new rim tape. You might be able to use insulating tape.
- Fit the tube and tyre in the correct position and direction
- Remove stickers. I tried to put mine back on the paper they arrived on, but they lost some stickiness.
Findings
I convinced myself there was a difference in smoothness at slower speeds, but perhaps there wasn’t.
From 25-35mph, everything felt much smoother. There isn’t a massive difference; as a guide, it’s in the magnitude of going from 23mm to 28mm tyres.
Take Out
If you have the time, inclination, and money, this is probably worth doing, but it is not essential. Even better if you can get someone else to do it for you as, realistically, it could be a 2-hour job or as little as 30 minutes a wheel if all goes smoothly the first time.
I still run tubes, so this was a great move, especially on wheels I’ve used for a few years and have taken a few nocks.
Legend Wheel Balancing kit is well thought through and priced right for a niche product. There are many alternative ways of achieving the same result for next-to-nothing; Legend gives you an all-in-one solution in a box.
More: Legend Wheels – XR One Wheel Balancing from 99.00€
Unaffiliated link, free product supplied, content not paid for.
Last Updated on 29 January 2026 by the5krunner
My favourite kit and nutrition
- Injinji – Runners protect your toes. Avoid discomfort and minor injury. Run more. Run faster. I use them.
- Garmin 90-degree charging adapter — The small adapter that keeps your charging cables tidy. Essential for race day. I use one.
- Garmin charging puck — the fastest and most reliable way to top up your Garmin before a session. I use one.
- Ravemen FR300 — Front light that mounts directly under your Garmin or Wahoo head unit. Keeps your bars clean and your beam pointed where it matters. I use one.
- Body Glide – The blue anti-chafe stick that all swimmers and many runners use. I use it.
- Maurten — The race nutrition trusted by elite athletes. Gels and drink mixes engineered to be easy on the stomach. I use them.
- Garmin Varia RTL515 — A radar rear light that alerts you to vehicles approaching from behind. Pairs with your Edge or Garmin watch. I use this model.
- Favero Assioma Pro RS2 — The power-meter pedals most serious cyclists choose. Accurate, easy to move between bikes. I use this model.
- Garmin Forerunner 970 — A serious choice for a pro-grade triathlon watch. I use this.
- Polar H10 — My daily driver for accurate, waking HRV readings.
- Wahoo ELEMNT Roam 3 — The bike computer that has the feature Garmin lacks: usability. I use mine on most rides.
Reader-Powered Content

This content is not sponsored. It’s mostly me behind the labour of love, which is this site, and I appreciate everyone who supports it.
Support the site: Follow (free, fewer ads) · Subscribe (paid, ad-free) · Buy Me A Coffee ❤️
All articles are written by real people, fact-checked, and verified for originality. See the Editorial Policy. FTC: Affiliate Disclosure — some links pay commission. As an Amazon Associate, I earn from qualifying purchases.

tfk is the founder and author of the5krunner, an independent endurance sports technology publication. With 20 years of hands-on testing of GPS watches and wearables, and competing in triathlons at an international age-group level, tfk provides in-depth expert analysis of fitness technology for serious athletes and endurance sport competitors. ID
