Essential Garmin Settings Every New User Should Change on Day 1
Just unboxed your new Garmin Forerunner or Edge bike computer? These essential settings will transform your device from confusing to incredibly useful in under 10 minutes. Whether you’re training for your first 5K or tracking weekend rides, getting these basics right now will save you frustration later.
After testing dozens of Garmin devices over the years, I’ve identified the settings that matter most for new users—and the common mistakes that undermine your training data from day one.
Quick Setup for Day 1: This guide assumes you’ve paired your Garmin to the Garmin Connect app and know where the buttons are. Now let’s optimise it.
Difficulty: Beginner-friendly, with advanced tips included
Why Your Initial Settings Matter More Than You Think
Your Garmin isn’t just tracking workouts for Strava bragging rights. The device uses your data to calculate wellness scores, recovery metrics, and training recommendations. Poor settings from day one lead to inaccurate data, resulting in poor training advice for weeks.
Here’s what needs to be accurate from your first workout:
[2024] Add parkrun barcode to Apple Watch or Garmin Forerunner/Fenix
- Heart rate data: Critical for pacing and essential for physiology features to work. Wear your watch overnight at least 5 nights per week, or readiness features won’t function.
- GPS data: Normal accuracy works for cycling and Strava. High-precision GPS is only needed for precise run pacing or technical navigation.
- Background recording: Your Garmin saves heart rate, power, and GPS data even when not displayed on screen—so you can keep displays simple.
The Only 4 Metrics You Need on Day 1
Garmin bombards new users with dozens of data fields. Ignore them. Start with one simple screen showing these four metrics—you can add complexity later once you understand what matters for your training.
Your first custom data screen should display:
- Elapsed time or distance: Shows how long you’ve been out there. Choose whichever feels more natural for your sport.
- Current pace or speed: Runners typically prefer pace (minutes per kilometer), cyclists prefer speed (mph or kph). This tells you if you’re going too hard or too easy right now.
- Heart rate: Your best real-time indicator of effort. More reliable than pace since hills, wind, and fatigue affect speed but show up immediately in heart rate.
- Cadence: Steps per minute (running) or pedal RPM (cycling). Target 170+ for running, 85+ for cycling. This single metric improves technique faster than almost anything else.
What about power meters? Advanced metrics require external sensors—a power meter for cycling or Stryd for running. If you have these, use 3-second or 5-second power averages instead of pace. Power is the most accurate effort metric available.
How to Set Up Your First Sport Profile
Each activity (running, cycling, swimming) uses a separate sport profile. Each profile contains customizable data screens. Here’s how to create your simple 4-metric screen:
- Open Garmin Connect app on your phone
- Go to Device Settings → Activity Profiles
- Select “Run” or “Bike”
- Tap “Data Screens”
- Create a new screen with 4 fields
- Add the metrics listed above
Set Up Auto Lap (This Changes Everything)
The metrics above show what’s happening right now. But Garmin’s auto lap feature periodically displays a summary screen showing how your performance is changing over time. This is incredibly valuable for pacing.
Auto lap automatically marks intervals and shows you a summary of that interval’s average pace, heart rate, and other metrics. It’s like having a coach tap your shoulder every kilometer.
Recommended auto lap settings:
- Running: Set to 1km or 1 mile
- Cycling: Set to 10 minutes or 5km
Pro tip: Add “Lap Average Pace” as a data field alongside “Current Pace.” This instantly shows if you’re ahead or behind your target pace for that interval. When you’re exhausted, Garmin’s physical buttons make switching between data screens much easier than an Apple Watch touchscreen with sweaty fingers.
Connect to Strava (Free and Takes 2 Minutes)
You don’t need Strava, but creating a free account is standard practice for runners and cyclists. It’s where the community lives, and Garmin integrates seamlessly.
Garmin automatically uploads workouts to Strava for free. Strava’s paid features (Live Segments, route planning) are optional—the basic social features work fine without paying.
Critical privacy step: Before your first workout uploads, set up Strava privacy zones around your home and workplace. This hides the start and end of your activities so strangers can’t identify where you live.
Link your accounts in the Garmin Connect smartphone app under Settings → Connected Apps → Strava. Your workouts will automatically appear on Strava within minutes of finishing.

Fix Your Heart Rate Zones (Garmin Gets This Wrong)
Garmin’s default heart rate zones are often wildly inaccurate because they’re based on generic age formulas, not your actual fitness. Wrong zones mean your training recommendations will push you too hard or too easy.
The biggest mistake new Garmin users make: Trusting the default zones. This undermines every physiology feature your watch offers.
How to Set Accurate Heart Rate Zones
Do this test within your first week:
- Warm up for 10-15 minutes
- Run or cycle at the hardest pace you can sustain for 30 minutes
- Note your average heart rate during the final 20 minutes
- Use this number as your lactate threshold (LTHR)
- In Garmin Connect, go to User Settings → Heart Rate Zones and enter this manually.
This one change makes Training Readiness, VO2max estimates, and workout recommendations dramatically more accurate.
Garmin HRV – What should my Garmin HRV be? – LARGE Lifelines Cohort Study [Science]
Other Important Physiology Settings
Garmin’s wellness features (VO2max, Sleep Score, Training Readiness) take about a week to calibrate. For now:
- Set your regular sleep and wake times in Garmin Connect
- Wear your watch overnight at least 5 nights per week
- Let it collect data for 7-10 days before trusting the metrics
GPS and Battery Settings That Actually Matter
New users often crank the GPS to maximum accuracy and wonder why their battery dies. Here’s what you actually need:
GPS Accuracy Modes
- GPS-only mode: Perfect for cycling, casual running, and general Strava use. Saves significant battery.
- SatIQ or All Satellites: Only needed for precise run pacing or navigation in areas with poor GPS coverage (dense forest, urban canyons).
The difference in accuracy for most workouts is negligible, but battery impact is huge.
Quick Battery Life Fixes
If your battery drains faster than expected, change these three settings:
- GPS: Use GPS-only instead of multi-satellite mode
- Backlight: Set timeout to 15 seconds (default is often much longer)
- Pulse Ox: Turn off continuous SpO2 monitoring—it’s a massive battery drain for minimal benefit
These three changes can double your battery life between charges.
Calibrate Your Elevation
Garmin calculates elevation gain during workouts, but it needs calibration to be accurate:
- Find your home’s actual elevation at whatismyelevation.com
- Stand outside your front door
- Go to Settings → Sensors → Altimeter → Calibrate
- Enter your actual elevation
Do this once, and your elevation data will be accurate for all future workouts.
Should You Use Garmin’s Training Plans?
Garmin offers two types of training guidance, both free and both surprisingly good:
Daily Suggested Workouts
Daily Suggested Workouts analyses your recent training and recovery to recommend today’s optimal workout. The AI considers your fatigue level, recent training load, and upcoming events. It’s like having a coach who knows when to push you and when to back off.
These work best after 2-3 weeks of data collection. Enable them in Garmin Connect under Training → Daily Suggested Workouts.
Garmin Coach (Free Race Plans)
Garmin Coach provides free adaptive training plans for 5K, 10K, and half-marathon distances. Unlike static plans from websites, these adjust automatically if you miss a workout or need extra recovery.
Available coaches include former Olympian Jeff Galloway and certified coaches Greg McMillan and Amy Parkerson-Mitchell. Each has a different philosophy and workout style.
Customize Your Watch Face (Optional But Fun)
The Connect IQ store offers thousands of free watch faces, widgets, and data fields. This is entirely optional, but many users enjoy personalizing their device.
Popular options:
- Watch Faces: CRYSTAL is highly rated and shows comprehensive data at a glance
- Widgets: Add-ons accessible from your main menu when not recording a workout
- Data Fields: Custom metrics you can add to your sport profiles (advanced users only)
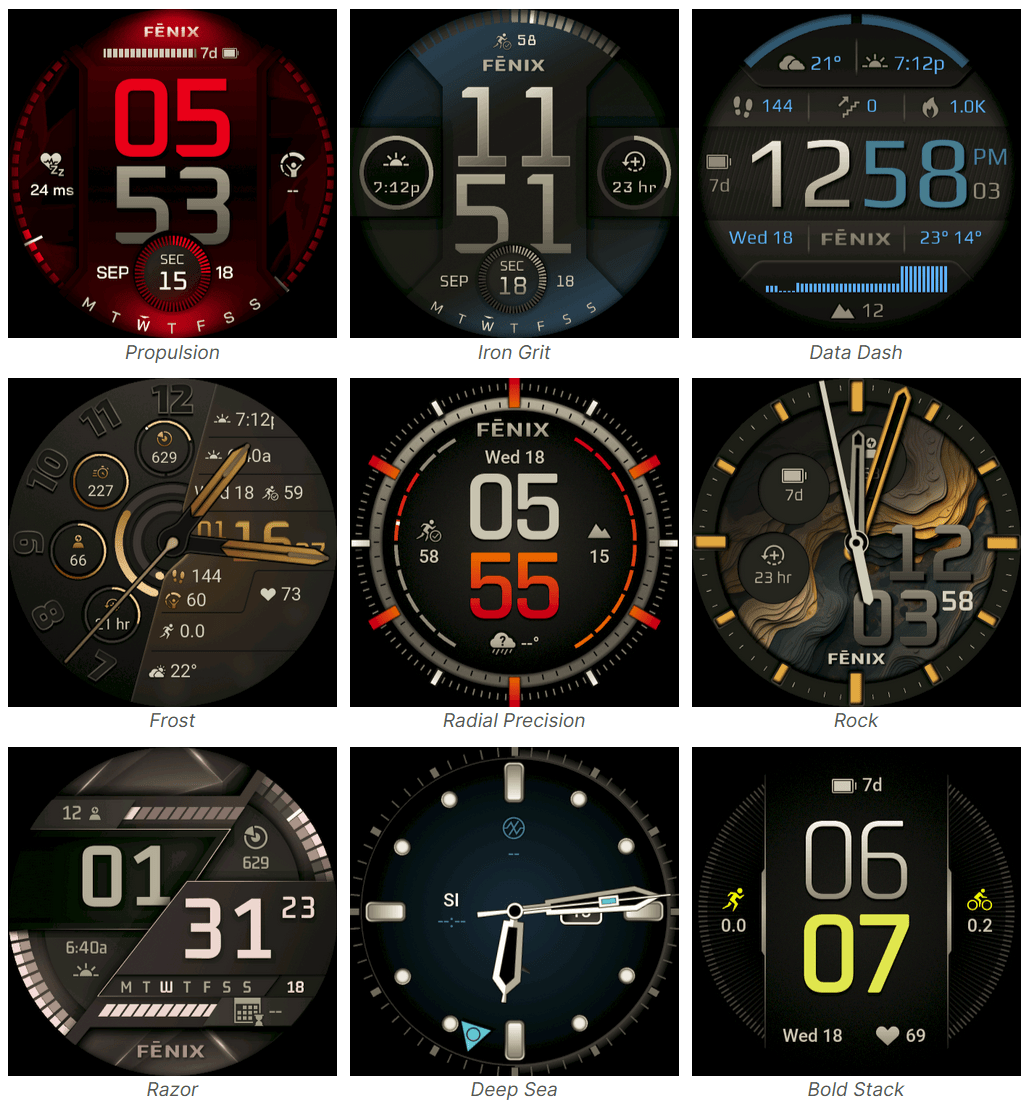 9 new Garmin Fenix 8 watch Faces
Advanced Accessories Worth Considering
After using Garmin devices for years, these are the accessories that made the biggest difference to my training:
- Safety (Cycling): Garmin Varia Radar is the single best cycling safety device available. It detects cars approaching from behind and alerts you on your Garmin display.
- Heart Rate Accuracy: The Garmin HRM-PRO Plus chest strap is significantly more accurate than wrist-based heart rate, especially during intervals.
- Running Power: Stryd footpod provides instant, accurate pace (better than GPS) plus running power metrics.
- Navigation: Sync courses from Ride With GPS or Komoot for turn-by-turn directions on your wrist.
Your Day 1 Checklist
Here’s everything from this guide in a straightforward checklist:
- Create one simple data screen with 4 metrics: time/distance, pace/speed, heart rate, cadence
- Set auto lap to 1km (running) or 10 minutes (cycling)
- Link to Strava and set up privacy zones
- Do a 30-minute threshold test to set accurate heart rate zones
- Set your sleep/wake times in Garmin Connect
- Switch the GPS to “GPS-only” mode
- Turn off continuous Pulse Ox
- Set the backlight timeout to 15 seconds
- Calibrate the altimeter at your front door
- Wear your watch overnight for at least 5 nights per week
Complete these steps, and your Garmin will provide accurate data and useful training guidance from day one. Everything else can wait until you understand what matters for your specific goals.
Last Updated on 29 January 2026 by the5krunner
Reader-Powered Content

This content is not sponsored. It’s mostly me behind the labour of love, which is this site, and I appreciate everyone who supports it.
Support the site: Follow (free, fewer ads) · Subscribe (paid, ad-free) · Buy Me A Coffee ❤️
All articles are written by real people, fact-checked, and verified for originality. See the Editorial Policy. FTC: Affiliate Disclosure — some links pay commission. As an Amazon Associate, I earn from qualifying purchases.

tfk is the founder and author of the5krunner, an independent endurance sports technology publication. With 20 years of hands-on testing of GPS watches and wearables, and competing in triathlons at an international age-group level, tfk provides in-depth expert analysis of fitness technology for serious athletes and endurance sport competitors.
